What is the Number Input?
Number captures integer or decimal values only — non-numeric characters are blocked. It can be paired with optional minimum / maximum bounds and a unit label to provide clear context for the expected value. Use Cases:- Quantity: Record the number of items delivered or collected
- Weight or measurement: Capture weight in kg, distance in km, or any measurable quantity
- Rating or score: Record a numeric rating (e.g., satisfaction score 1–5)
Number Properties
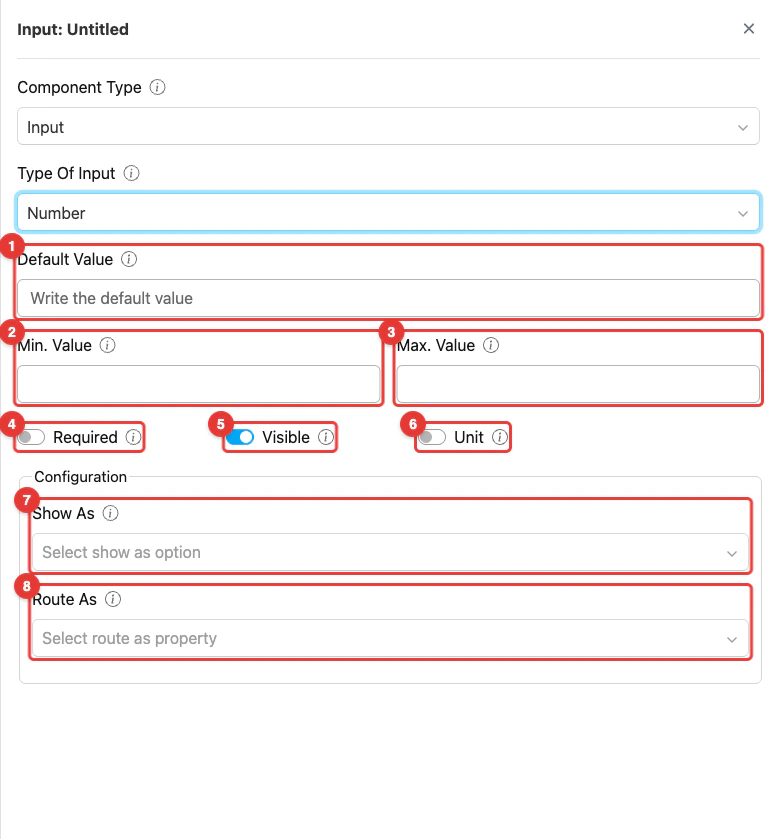
Component number input settings
- Default Value: This setting allows you to set a pre-filled number for this component. If a value is specified, any task created with this flow will use it as the initial value.
- Min. Value: This setting defines the lowest number that users are allowed to input. Any value below this limit will be rejected.
- Max. Value: This setting defines the highest number that users are allowed to input. Any value above this limit will be rejected.
- Toggle Required: This option makes the number input mandatory. If not filled, users cannot proceed to other activities.
- Toggle Visible: This setting affects the visibility of the component during task creation on the web and mobile, as well as task viewing on the mobile app. If the component is not visible, it will not be shown in the UI. However, both visible and hidden component data will be exported, regardless of their visibility status.
- Toggle Unit: This option allows you to display a unit of measurement next to the number (for example, kg, pcs, or m) so users have a clear context for the value being entered. When this toggle is enabled, an additional input form will appear to define the unit value.
- Show As: This configuration, controls how the input value is displayed within the task. The value of this component will appear on the task table in the Task menu as the Title, Content, or Label, depending on the option selected.
- Route As: This configuration, links the component to a form field in the Routing/Visit menu. The form field in Routing/Visit will be filled in automatically based on the option selected in the dropdown. For Number Input, this component can be mapped to Visit Duration or Visit Group Priority.
How to Configure Number
Step 1: Add the Component
In the Flow Builder, click Add Component on the target page. Set Component Type to Input and Type Of Input to Number.Step 2: Set Basic Properties
Enter the component Title (e.g., “Quantity Delivered”). Toggle Required and Visible as needed. Optionally enter a Default Value.Step 3: Set Min and Max Value (optional)
Define an allowed range:- Min. Value — Lowest accepted number (e.g.,
0to disallow negatives) - Max. Value — Highest accepted number (e.g.,
100for a percentage)
Step 4: Enable Unit (optional)
Toggle Unit on and specify a unit label (e.g.,kg, pcs, m) to display next to the number on both web and mobile.
Step 5: Configure Show As (optional)
In the Configuration section, set Show As to Title, Content, or Label to control how the number value appears on the task list in the Task menu.Step 6: Configure Route As (optional)
Still in the Configuration section, select a Routing/Visit field to map this value into. Valid options for Number Input: Visit Duration (visit duration in minutes used by the route planner) or Visit Group Priority (priority level for grouping visits).How Number Works in Tasks
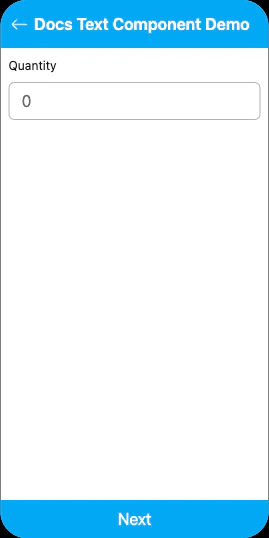
Number input on mobile preview
- The Number field shows a numeric keyboard input with the configured Unit displayed if enabled
- The field enforces Min and Max bounds — values outside the range are rejected
- The field may already be populated:
- From task creation: If the task was created with a numeric value, it is pre-filled
- From Default Value: The flow-level default appears if no value was provided at creation
- The worker can edit the number before completing the page
Related
- Currency Component — Numeric input formatted as money
- Text Component — Free-form text input
- Input Component Overview