Required permission:
- View Workflow
- Create Workflow
Viewing the Workflow List
Navigate to Flow > Workflow to open the Workflow page. The page shows a list of every Workflow in your organization, a search bar to filter Workflows by name, and a New button (visible only if you have the Create Workflow permission).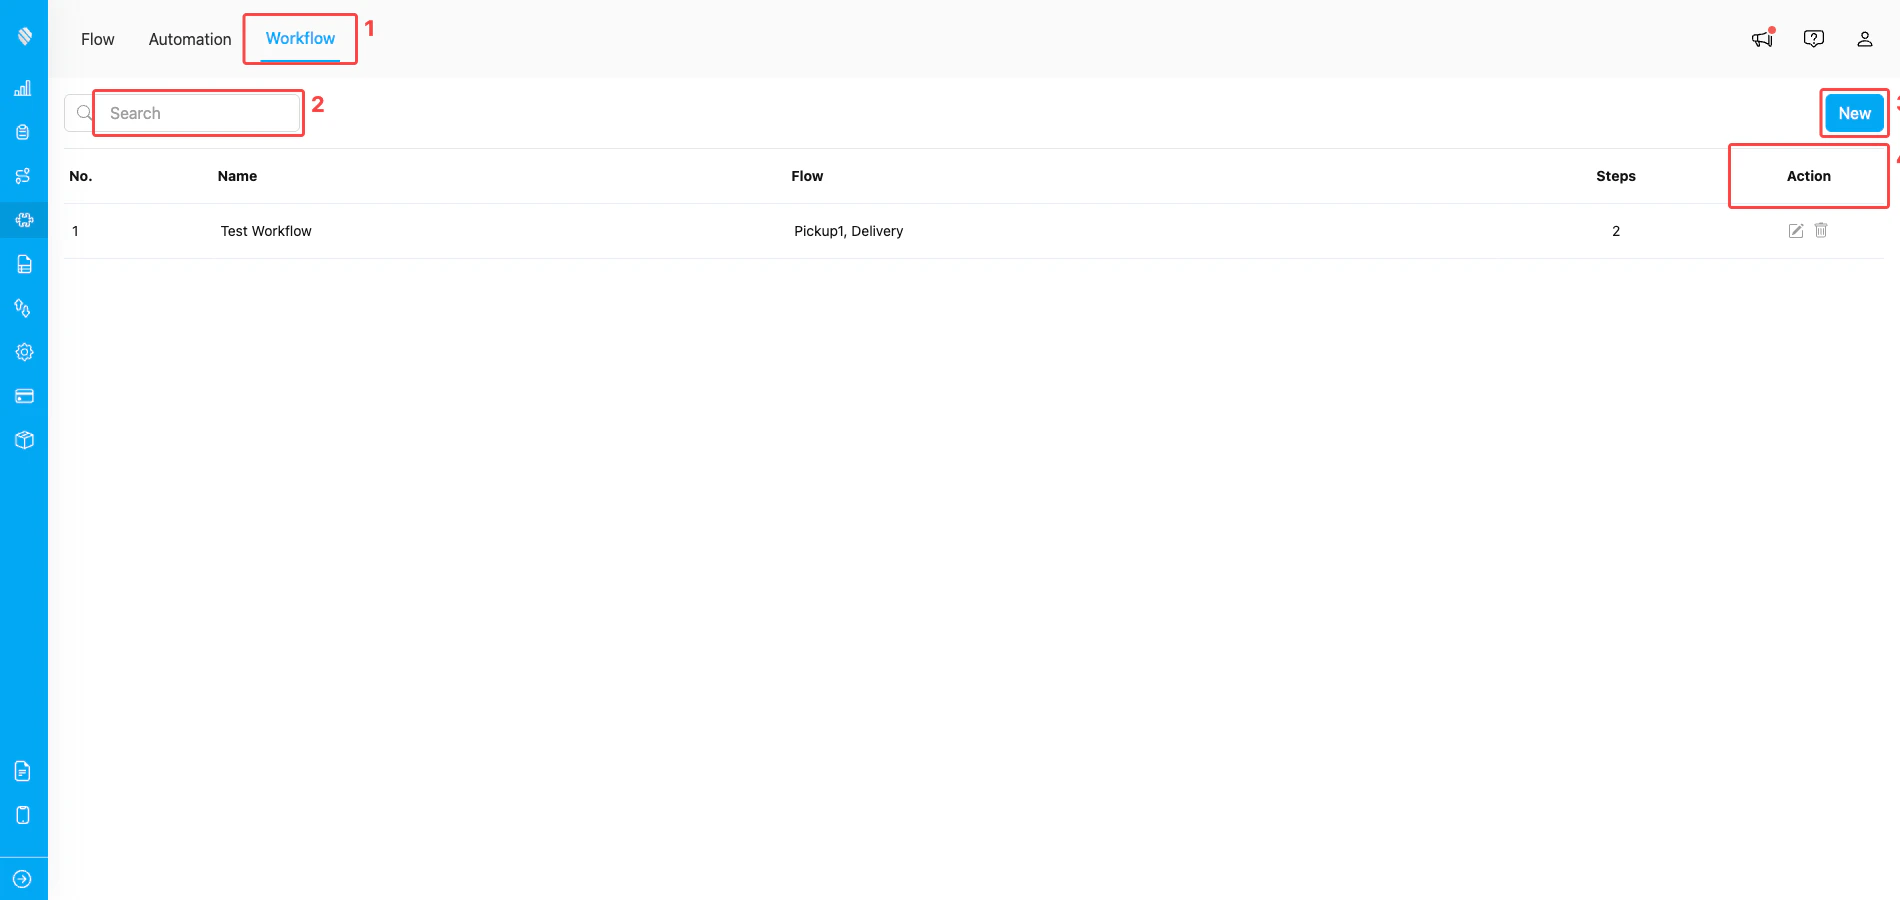
Workflow page with the navigation tab, search bar, New button, and Action column
- Workflow tab — open this tab inside the Flow section to land on the Workflow page.
- Search bar — filter the list by Workflow name.
- New button — open the Create Workflow modal (visible only if you have the Create Workflow permission).
- Action column — Edit (pencil) and Delete (trash) buttons for each Workflow row.
Creating a New Workflow
Click the New button in the top-right corner to open the Create Workflow modal.Step 1: Enter the Workflow Name
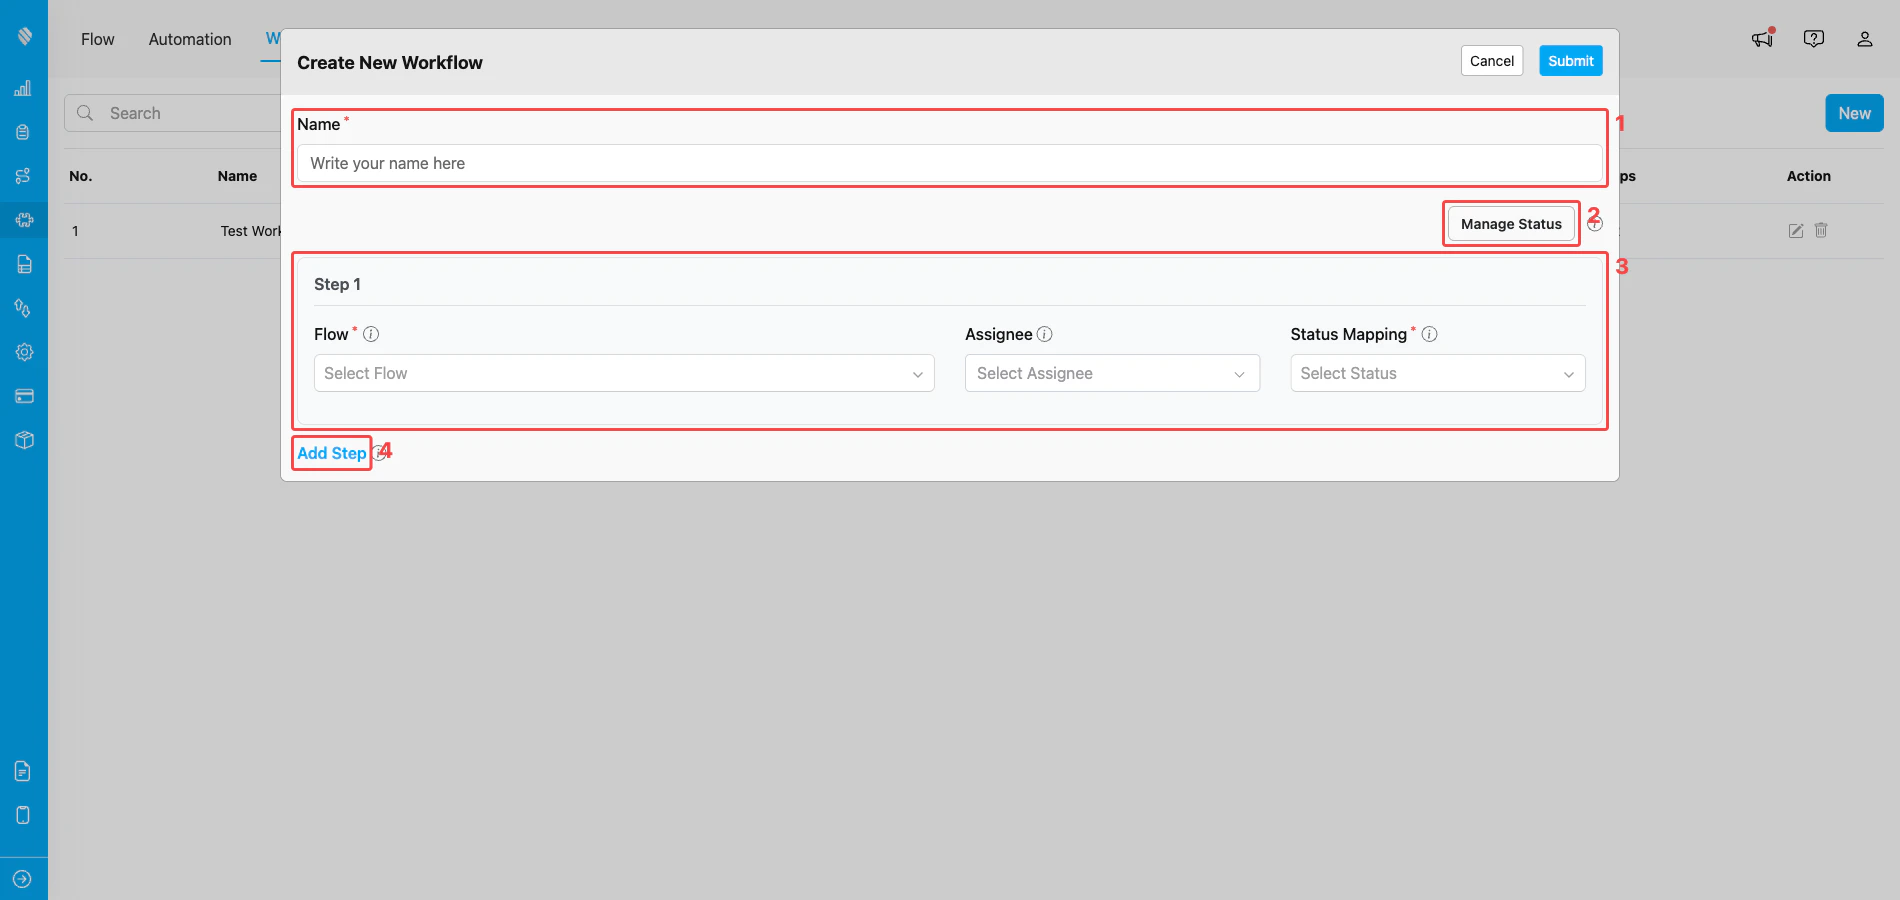
Create Workflow modal — Name field, Manage Status button, Step 1 card, and Add Step link
- Name — type the Workflow name. The name must be unique within your organization, use only letters, numbers, and spaces (no special characters), and be between 2 and 100 characters long. Use a descriptive name that reflects the process, such as “Pickup to Delivery” or “Inspection and Report”.
- Manage Status — open the status management modal to add, rename, or remove custom statuses used in Status Mapping. See Managing Workflow for details.
- Step 1 — the first step card. Pick the Flow, Assignee, and Status Mapping for this step (see Step 2 below for the details).
- Add Step — append another step to the Workflow. A Workflow can have between 1 and 10 steps.
Step 2: Configure the First Step
Every Workflow must have at least 1 step and can have up to 10 steps. Each step requires the following:- Flow (required) — pick the Flow used for this step. The dropdown lists the Flows available in your organization. Each step must use a different Flow — the same Flow cannot be reused on multiple steps of the same Workflow.
- Assignee (optional) — pick one or more users who will be assigned by default to the task created at this step. Leave empty if you do not want a default assignee — the assignee can still be picked manually when an Activity is created.
- Status Mapping (required) — pick the status the step’s task is marked as when it is completed. The dropdown lists the Workflow’s default statuses (Unassigned, Ongoing, Done) plus any custom statuses added via Manage Status. For example, a “Pickup” step can be mapped to a custom Picked Up status while still progressing the task as Done in the system.

Flow dropdown listing the Flows available in your organization
Each step in a single Workflow must use a different Flow. The same Flow cannot be selected twice in the same Workflow.
Step 3: Configure Field Mapping
Expand the Field Configuration section on the step card to set the field values for that step.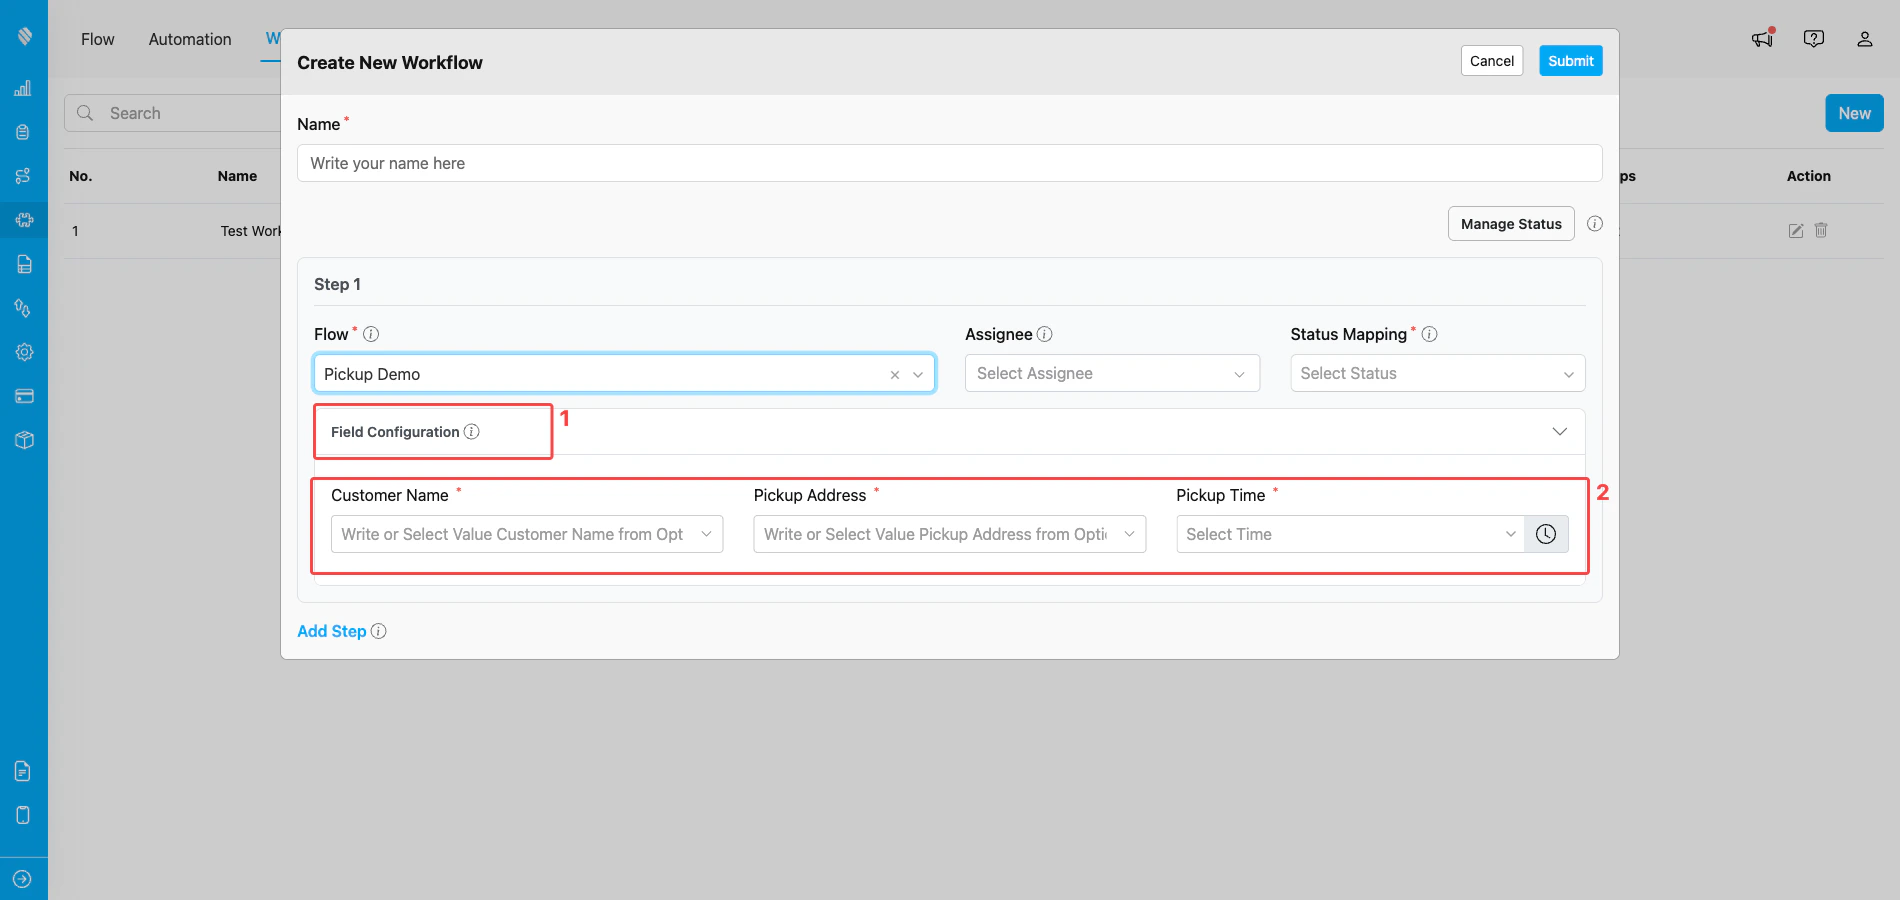
Field Configuration section showing the fields available for the selected Flow
- Field Configuration header — click the header to expand or collapse the section. The chevron icon on the right indicates the current state.
- Field inputs — one input per field on the selected Flow’s Initial Page. Enter a default value, or (on step 2 and later) pick a field from an earlier step to map from.
- Step 1 — fields can only be set as manual default values. Whatever you enter here becomes the starting value of the first task when an Activity is created from this Workflow.
- Step 2 and onwards — each field can be set as a manual default value or mapped from a field of any earlier step. When the earlier step’s task is completed and the next step’s task is created, the mapped value is copied automatically so the worker does not have to re-enter it.
Step 4: Add Additional Steps
Click Add Step to add another step to the Workflow.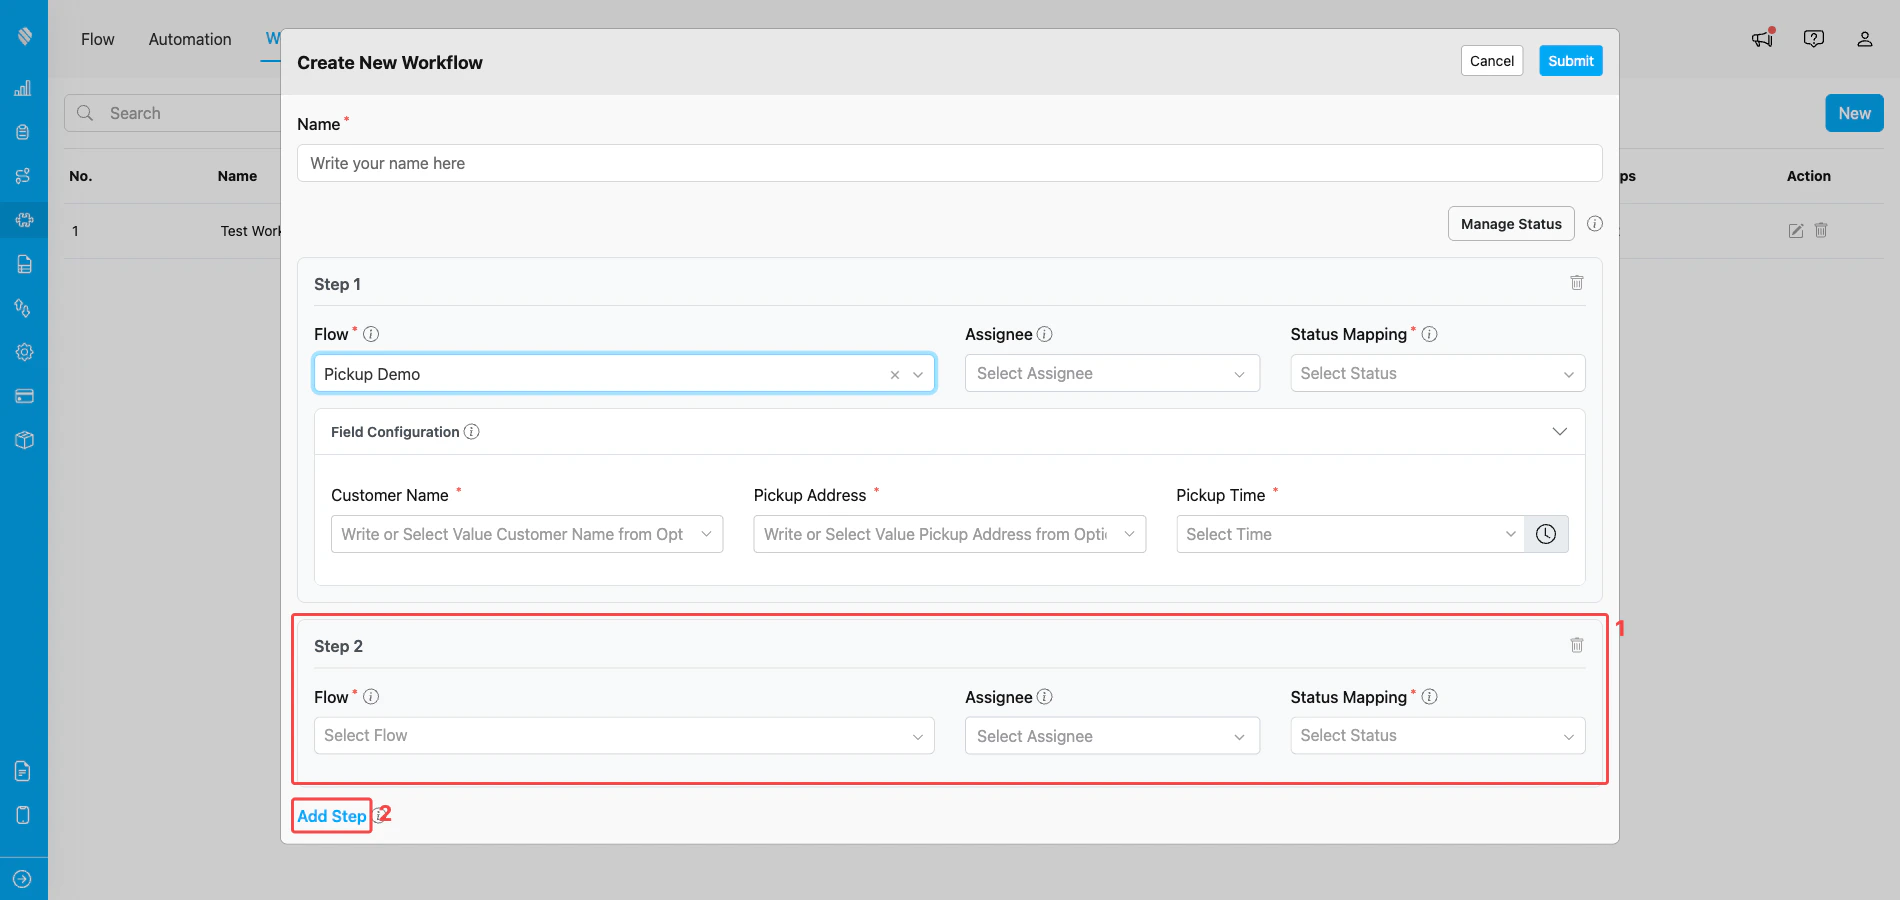
A new Step 2 card appears after clicking Add Step
- New step card — the new step (e.g., Step 2) appears below the existing steps with its own Flow, Assignee, and Status Mapping fields. Configure it the same way as Step 1.
- Add Step — keep clicking this link to append more steps. A Workflow can have at most 10 steps; submitting more is rejected.
- Select a Flow.
- Optionally pick an assignee.
- Pick a Status Mapping.
- Configure field mappings.
Step 5: Submit
When all steps are configured:- Review the Workflow Name and the configuration of every step.
- Make sure every required field marked with
*is filled. - Click Submit to create the Workflow, or Cancel to discard the changes.
Example: Pickup to Delivery Workflow
A common Workflow chains a Pickup Flow and a Delivery Flow, carrying the recipient details from the pickup stage into the delivery stage:- Step 1 — Pickup
- Flow: Pickup
- Assignee: warehouse runner
- Status Mapping: Done
- Field Configuration: set defaults for the pickup form
- Step 2 — Delivery
- Flow: Delivery
- Assignee: delivery driver
- Status Mapping: Done
- Field Configuration: map
customer_namefrom Pickup →recipient_nameon Delivery, andpickup_addressfrom Pickup →delivery_originon Delivery