What is the Date Input?
Date captures a single calendar day without time information, presented as a date picker on both the web form and the mobile app. The stored format isY-m-d (e.g., 2026-05-19).
Use Cases:
- Delivery date: Record the agreed delivery day for an order
- Expiry date: Capture product expiry information during stock checks
- Visit date: Record the scheduled date of a field visit when only the day matters
Date Properties
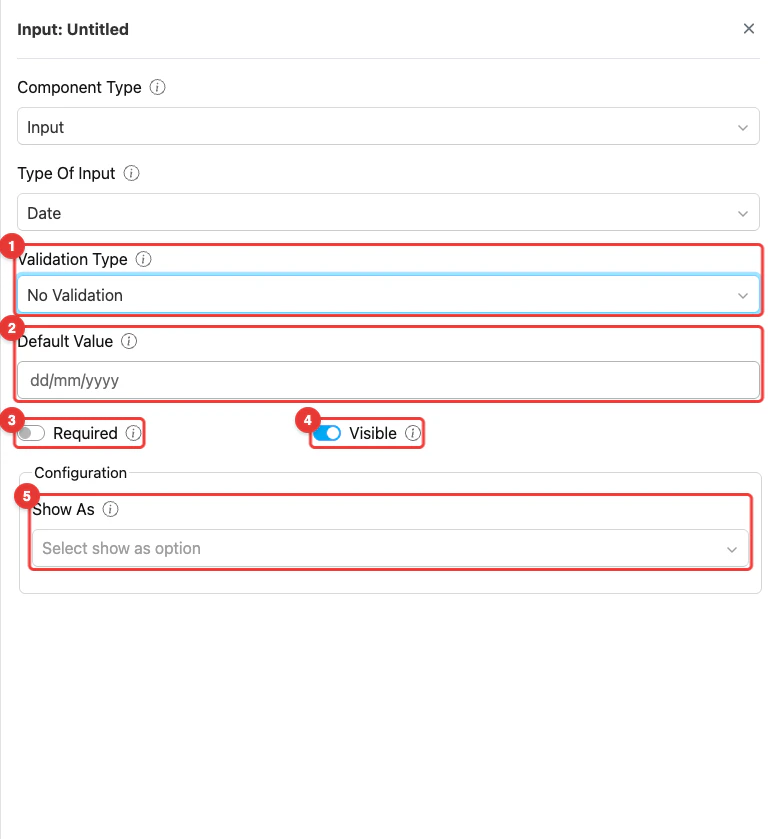
Component date input settings
- Validation Type: This setting controls how the selected date is validated. Available options are No Validation, Next 7 Days, Next 30 Days, Next 90 Days, and Custom Date Range, which restrict the date input to a specific range relative to the current date.
- Default Value: This setting allows you to set a pre-filled date for this component. If a value is specified, any task created with this flow will use it as the initial value.
- Toggle Required: This option makes the date input mandatory. If not filled, users cannot proceed to other activities.
- Toggle Visible: This setting affects the visibility of the component during task creation on the web and mobile, as well as task viewing on the mobile app. If the component is not visible, it will not be shown in the UI. However, both visible and hidden component data will be exported, regardless of their visibility status.
- Show As: This configuration, controls how the input value is displayed within the task. The value of this component will appear on the task table in the Task menu as the Title, Content, or Label, depending on the option selected.
How to Configure Date
Step 1: Add the Component
In the Flow Builder, click Add Component on the target page. Set Component Type to Input and Type Of Input to Date.Step 2: Set Basic Properties
Enter the component Title (e.g., “Delivery Date”). Toggle Required and Visible as needed. Optionally enter a Default Value using thedd/mm/yyyy format.
Step 3: Set Validation Type (optional)
Choose a Validation Type to restrict the allowed date range:- No Validation — Any date can be selected
- Next 7 Days — Only dates within the next 7 days from today
- Next 30 Days — Only dates within the next 30 days from today
- Next 90 Days — Only dates within the next 90 days from today
- Custom Date Range — Specify your own start and end date
Step 4: Configure Show As (optional)
In the Configuration section, set Show As to Title, Content, or Label to control how the date value appears on the task list in the Task menu.How Date Works in Tasks
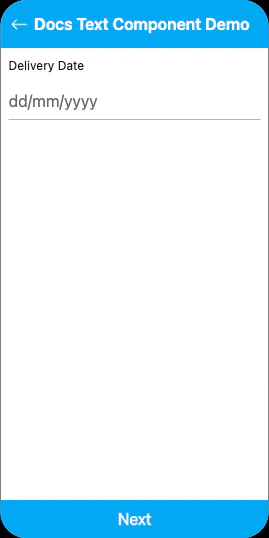
Date input on mobile preview
- The Date field shows a date picker with the format
dd/mm/yyyy - The picker enforces the configured Validation Type — dates outside the allowed range cannot be selected
- The field may already be populated:
- From task creation: If the task was created with a date value, it is pre-filled
- From Default Value: The flow-level default appears if no value was provided at creation
- The worker can change the date before completing the page
Related
- Date Time Component — Captures both date and time
- Time Component — Captures time only
- Input Component Overview