Understanding Main Tasks and Subtasks
- Main task — the task created from a Flow that has a Subflow component inside it.
- Subtask — a task that is created automatically for every Subflow component on the main Flow.
- Field mapping — when the main task is created, the values on its fields are copied into the matching fields on each subtask, based on the mapping set up in the Flow Builder.
How Subtasks Are Created
Once you create a task from a Flow that has Subflow components, MileApp runs these steps automatically:- The main task is created from the Flow, just like any other task.
- For each Subflow component on that Flow, MileApp creates a separate subtask from the referenced child Flow.
- Mapped fields are copied from the main task into the matching fields on every subtask.
- Each subtask is linked back to the main task, so dispatchers can see which tasks belong together.
- Subtasks inherit the main task’s assignee, hub, start time, and end time. If the main task already has an assignee, the subtasks start with status Ongoing.
Subtasks cannot be assigned, moved, or scheduled on their own. These changes must be made on the main task, and they are applied to every subtask automatically.
Viewing Main Tasks and Subtasks in the Task List
Desktop
In the Task list, a main task appears as an expandable group that shows the main task’s Flow name together with the number of subtasks it has. Click the group header to expand it, and every subtask shows up as a row underneath. Click again to collapse the group.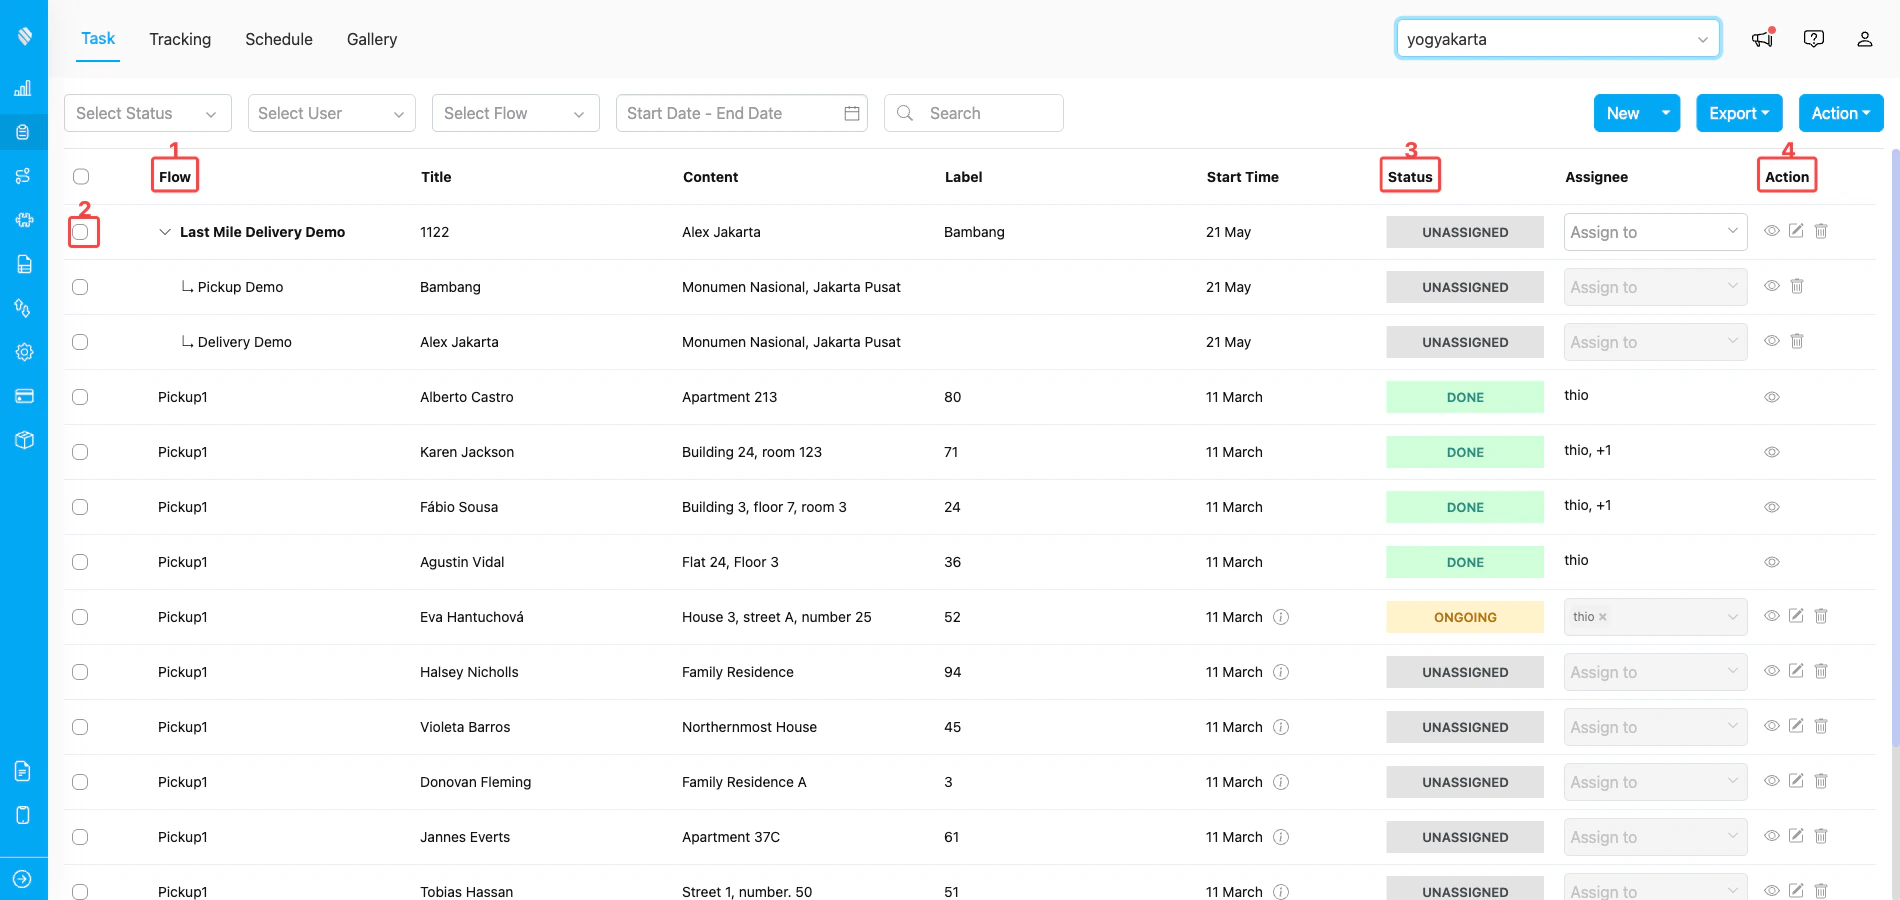
Task list showing main tasks as expandable groups with their subtasks indented below
- Flow column — the Flow name of each task. The main task row shows the parent Flow; every subtask row shows its own Flow indented underneath with the
↳marker. - Task selection checkbox — selecting the main task automatically includes all of its subtasks in any bulk operation.
- Status column — the current status of each task (Unassigned, Ongoing, or Done).
- Action column — row actions (view, edit, delete). The available actions depend on whether the row is a main task or a subtask.
Mobile View
On mobile view, main tasks appear as expandable card groups. Tap the group header to expand or collapse the subtask cards. Each card shows the Flow name, status, and assignee.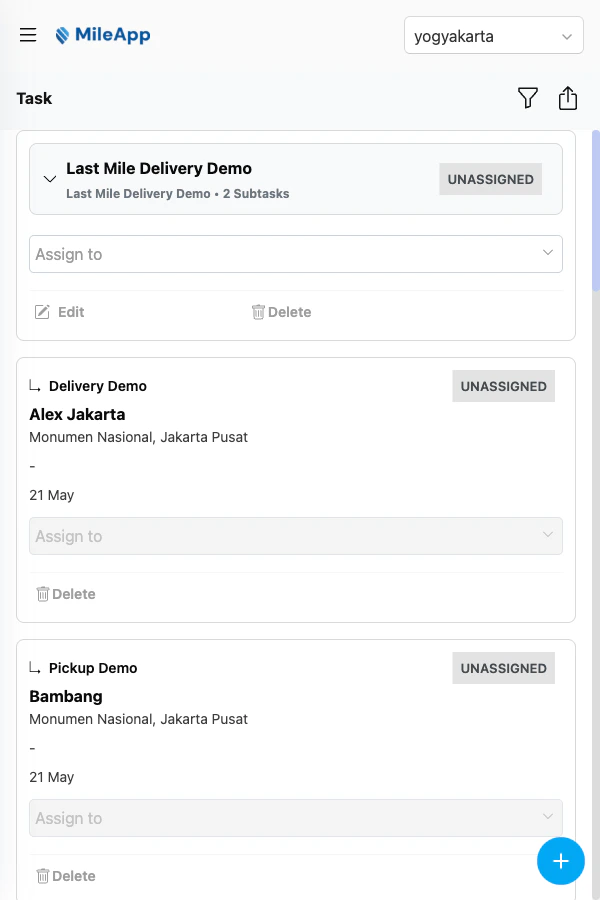
Mobile view of the Task list rendering main tasks as expandable card groups
Bulk Operations
Selecting a main task in the Task list automatically includes every subtask in the operation. Bulk operations are accessed through the Action button above the list.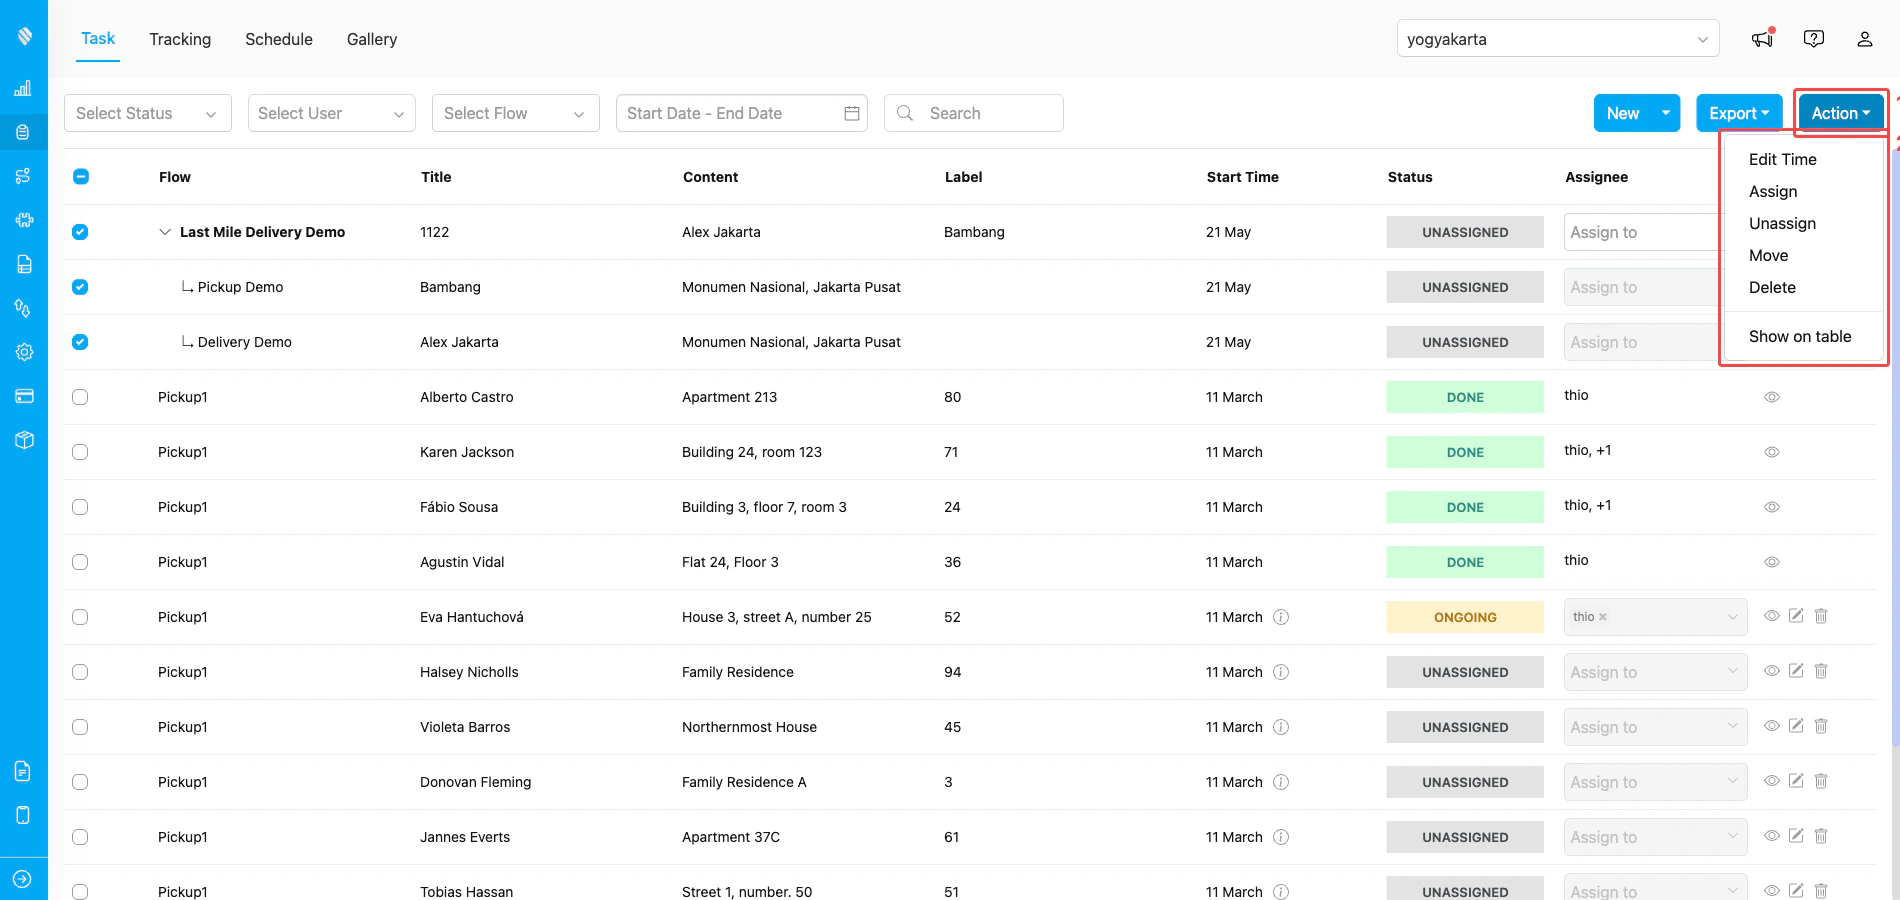
Selecting a main task and opening the Action menu — both rows are highlighted
- Action button — opens the bulk Action menu at the top-right of the Task list. The button becomes active once at least one task is selected.
- Action menu — the list of bulk operations you can run on the selected tasks.
- Edit Time — change the Start time and End time on all selected tasks at once.
- Assign — assign a user to the selected tasks.
- Unassign — remove the assignee from the selected tasks.
- Move — move the selected tasks to another hub.
- Delete — delete the selected tasks.
- Show on table — toggle which columns are visible in the Task list (this only changes the view; it does not modify any task).
Viewing Main Task Details
Opening a main task shows the main task data plus a summary of its subtasks.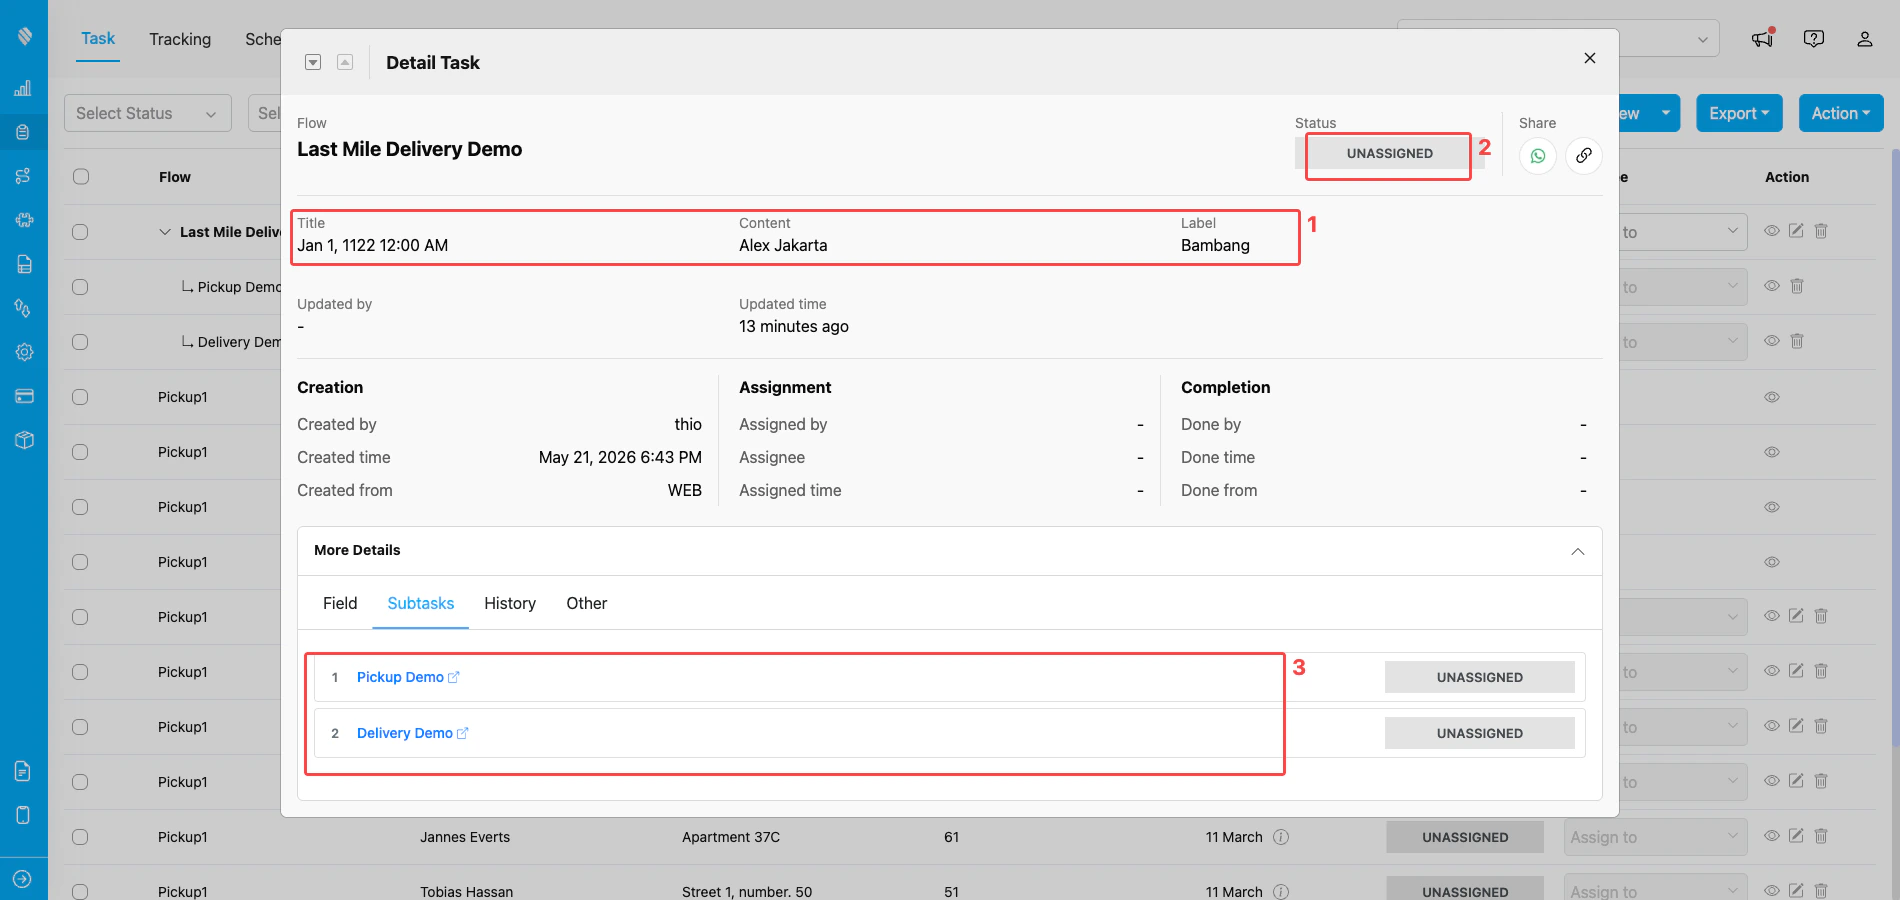
Main task detail dialog with its field data, status, and the list of subtasks underneath
- Field data area — the values captured on the main task (Title, Content, Label, and any other fields from the main Flow).
- Status badge — the main task’s own status (Unassigned, Ongoing, or Done).
- Subtasks list — every subtask connected to this main task, shown inside the Subtasks tab of the More Details section. Click a subtask name to jump to its own detail dialog.
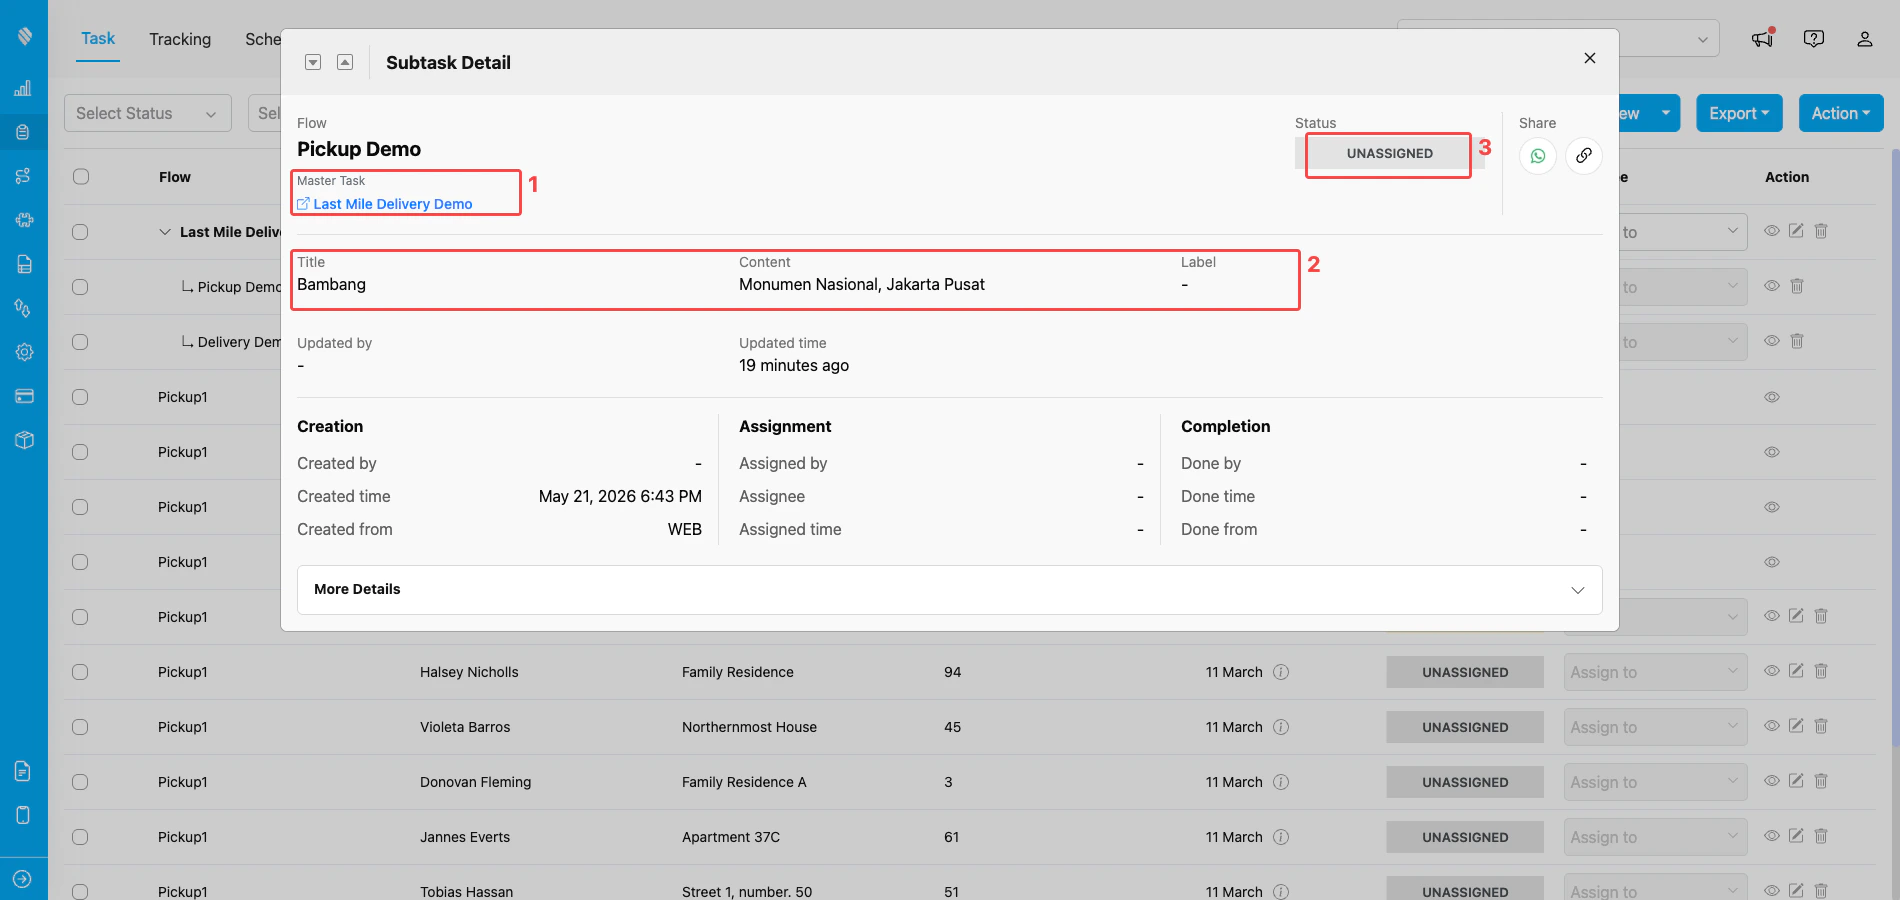
Subtask detail dialog opened from a main task’s subtask list
- Master Task link — the name of the main task this subtask belongs to. Click it to jump back to the main task’s detail.
- Field data area — the values captured on the subtask. Fields mapped from the main task through Subflow field mapping are pre-filled here.
- Status badge — the subtask’s own status (Unassigned, Ongoing, or Done).
Assigning Main Tasks
When you assign a user to a main task, the assignment is applied to every subtask too. You cannot assign a subtask independently — the assignee field on a subtask is disabled in the Task list. If the assignee on the main task is changed later, the new assignee replaces the previous assignee on every subtask.Moving Main Tasks
Moving a main task to a different hub also moves every subtask to the same hub. The move operation can only be performed when:- The main task is Unassigned, and
- Every subtask is also Unassigned.
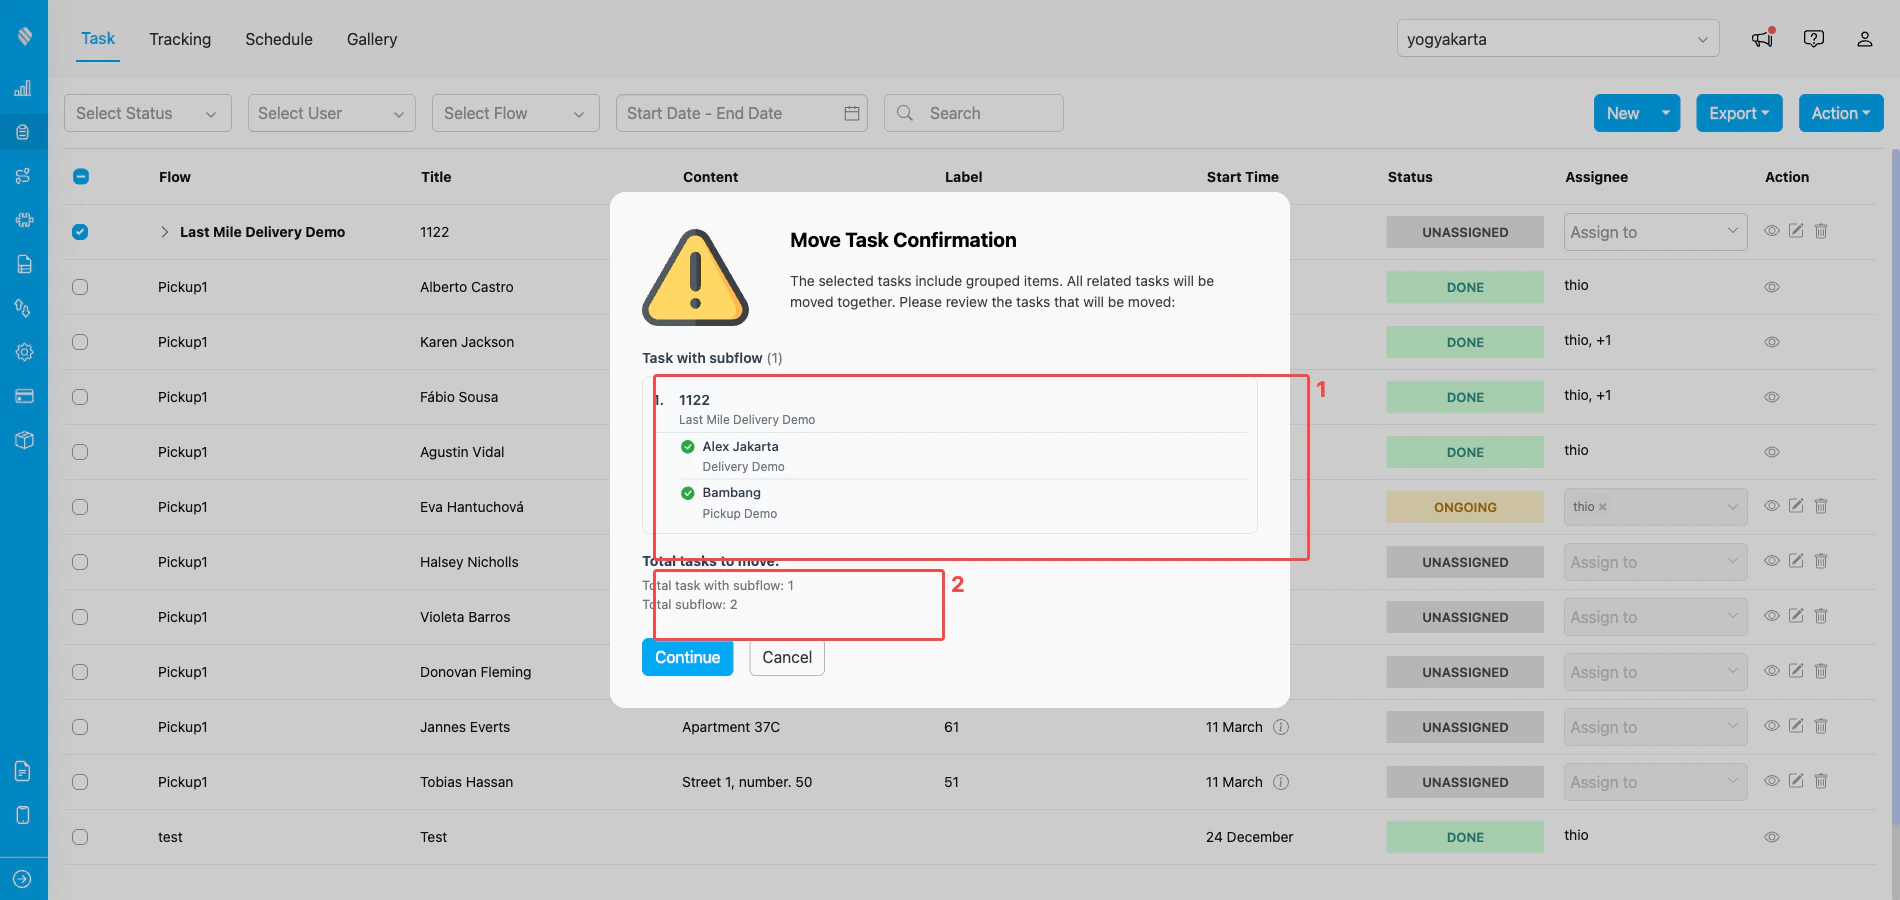
Move Task Confirmation listing the main task with all of its subtasks before the move runs
- Tasks to move — the main task and every subtask that will be moved together. Review the list to make sure no other task is accidentally included.
- Total tasks to move — a summary count showing how many main tasks (Total task with subflow) and subtasks (Total subflow) will be moved when you click Continue.
Editing Main Tasks and Subtasks
Editing a main task
The main task is fully editable in the Task list — title, custom fields, assignment, scheduling, and other Flow data can all be changed. Some changes on the main task are applied to every subtask automatically:- Assignee
- Start time
- End time
Editing a subtask
A subtask’s assignee, start time, end time, and hub cannot be changed on the subtask itself — these always come from the main task. The subtask’s own data fields are filled in by the field worker when they complete the task.Action buttons like Assign, Unassign, Move, and Delete are disabled on subtask rows in the Task list. Use the main task to perform these actions instead.
Deleting Main Tasks and Subtasks
Deleting a main task
Deleting a main task also deletes every subtask connected to it. Before the deletion runs, the Task list shows a confirmation dialog that lists every task that will be removed, so you can review what’s affected before confirming.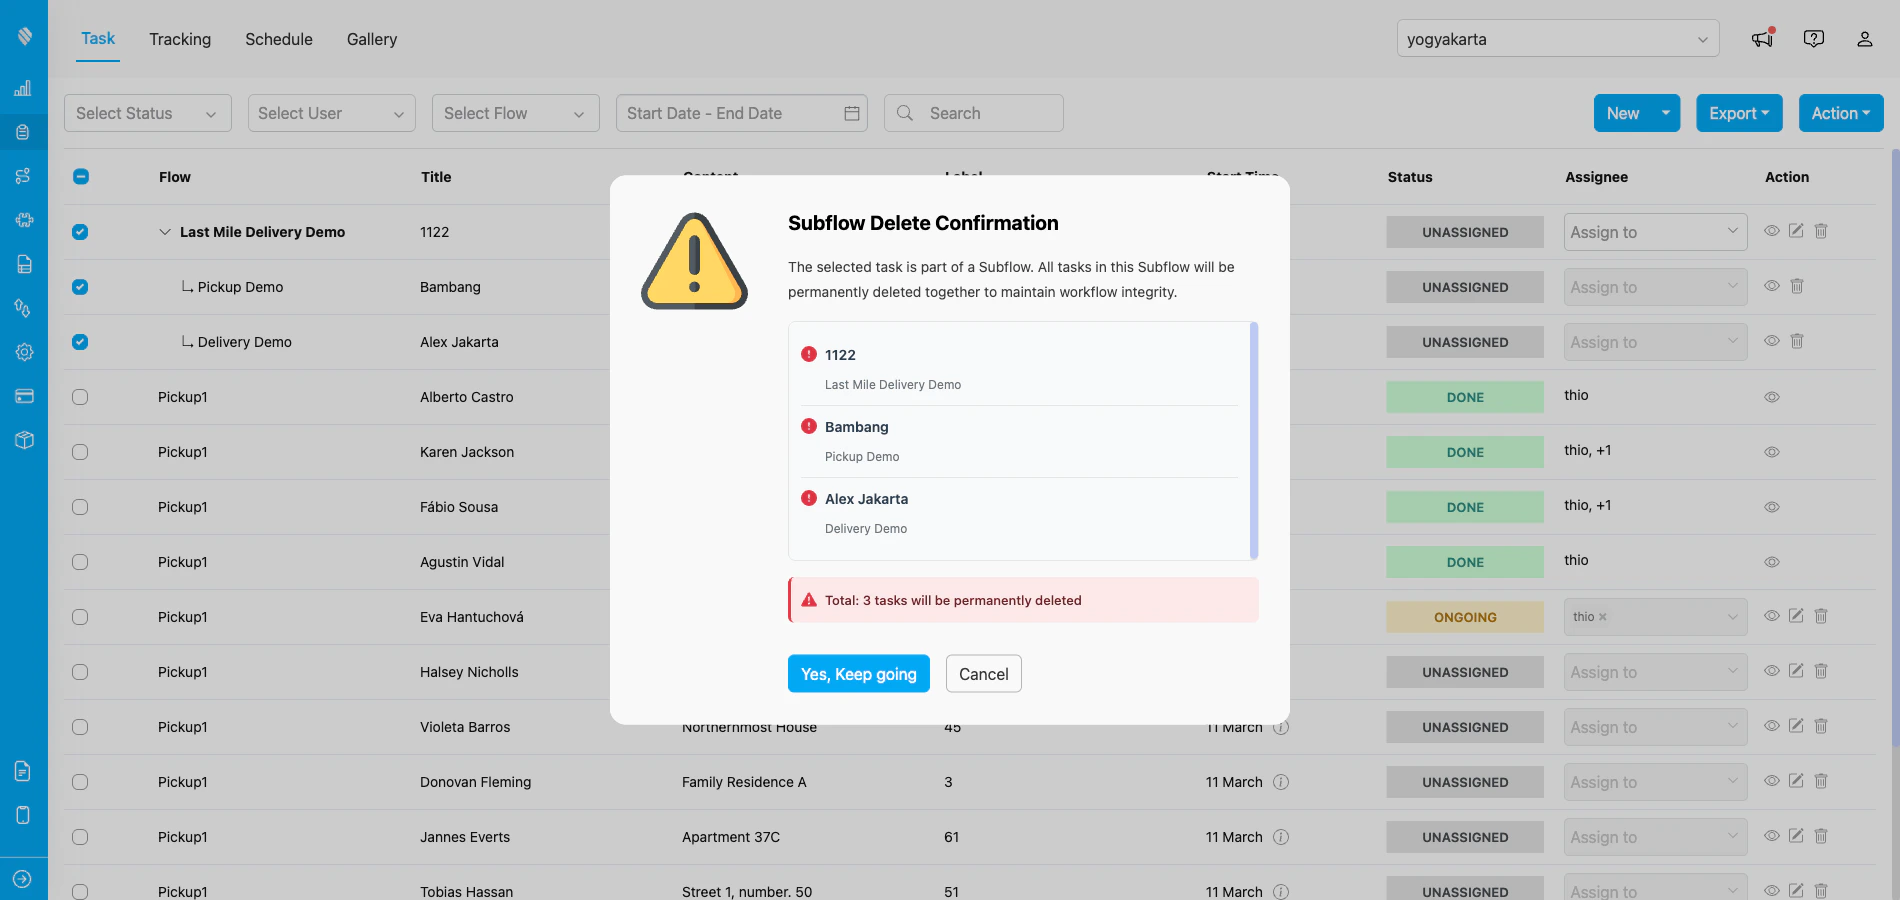
Confirmation dialog listing the main task and its subtasks that will be deleted together
Deleting a subtask on its own
- A subtask that belongs to a Required Subflow cannot be deleted on its own — it can only be removed together with its main task.
- A subtask from a non-Required Subflow can be deleted individually, as long as it is not already in status Done.