Required permission:
- View Workflow
What is a Workflow?
A Workflow is a named template that lists the Flows that make up a multi-step process. For example, a logistics process might combine a Pickup Flow followed by a Delivery Flow followed by a Confirmation Flow — each step using its own Flow form and optionally assigned to a different team member. Workflows themselves are not tasks. They become real tasks only when an Activity is created from them. Each Activity instantiates the Workflow into a main task plus one subtask per step, with field mappings carrying data forward through the chain. Use Cases:- Pickup → Delivery → Confirmation: different forms for the pickup runner, the delivery driver, and the recipient confirmation step
- Order fulfilment: packing, dispatch, last-mile delivery, and proof-of-delivery as separate, trackable stages
- Inspection or audit: opening checklist, field measurement, and reporting, completed by different roles
- Multi-stage approval: submission, supervisor review, and final approval, with data carrying forward between stages
Workflow Building Blocks
Every Workflow is configured from the same Create/Edit Workflow modal. The numbered boxes below highlight each building block as it appears in the modal.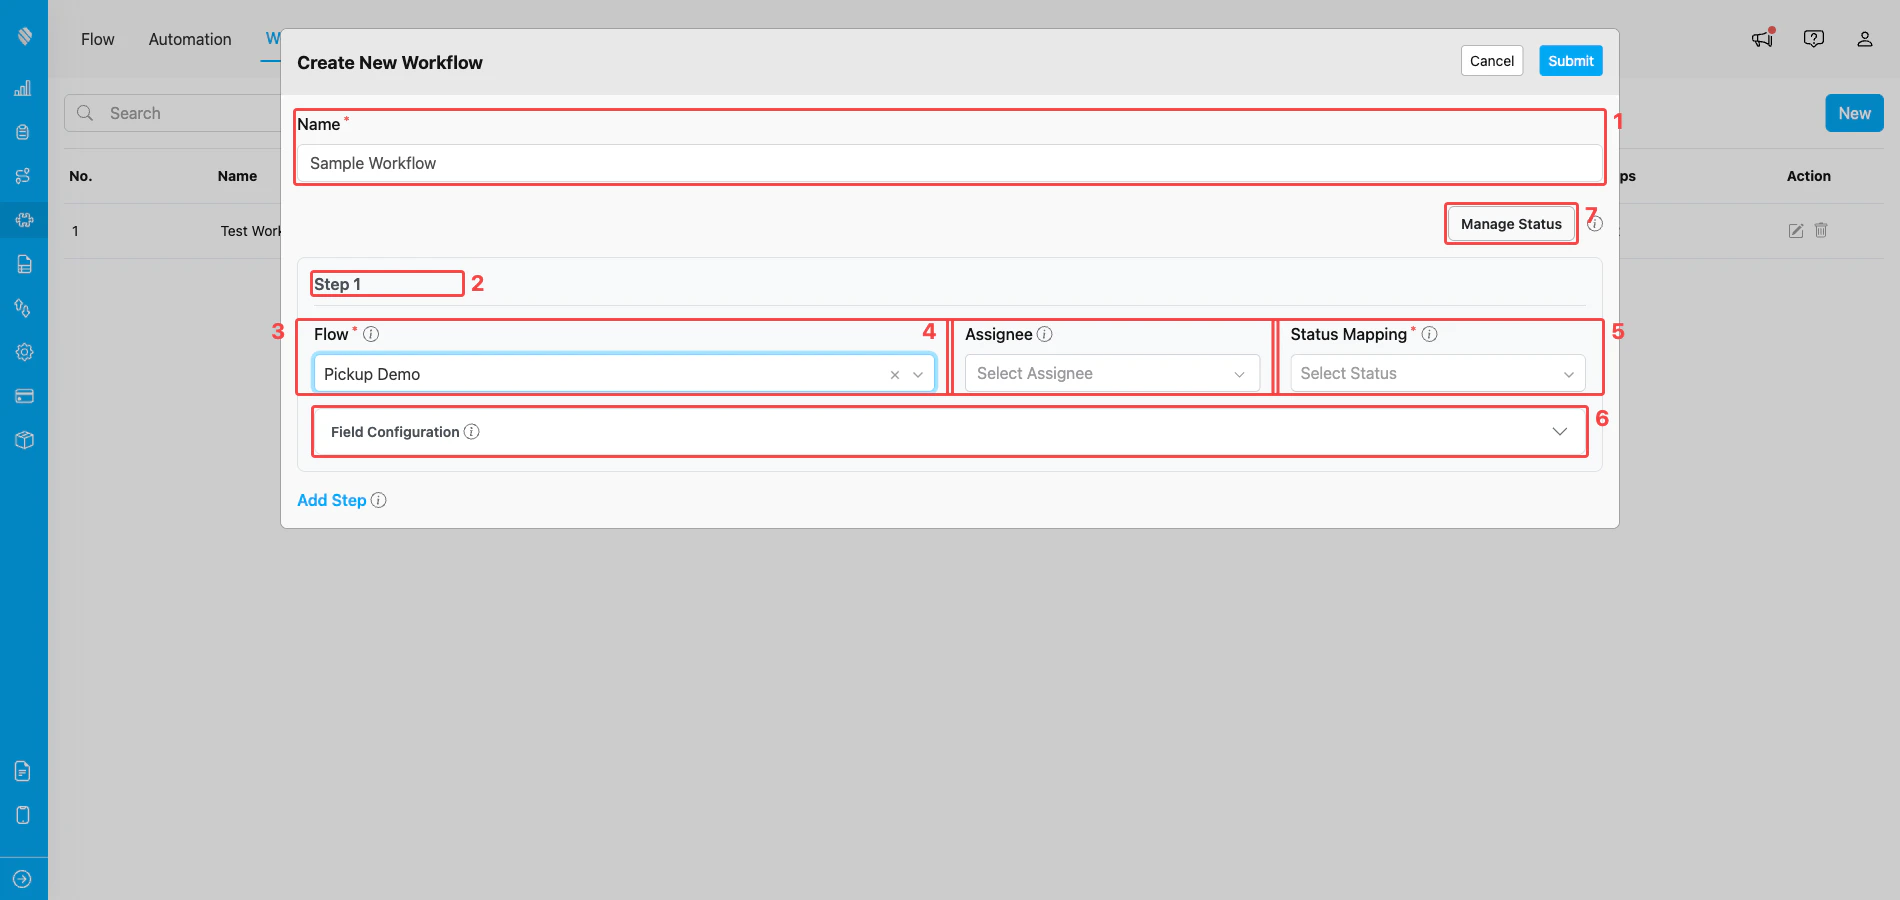
Create Workflow modal — the building blocks that make up a Workflow
- Name — a unique name within your organization, made of letters, numbers, and spaces only (no special characters). Must be between 2 and 100 characters.
- Steps — an ordered list of between 1 and 10 stages. Each step references one Flow and runs in order (step 1 → step 2 → step 3, and so on). Click Add Step to append more steps, up to the 10-step limit.
- Flow per step — the Flow form the field worker fills in for that step. Every step in the same Workflow must use a different Flow.
- Assignee per step — one or more users assigned by default to tasks created at that step. The assignee is optional — leave empty to assign manually when the Activity is created.
- Status Mapping per step — the status that the step’s task is marked as when the step is completed. The dropdown lists the Workflow’s default statuses (Unassigned, Ongoing, Done) plus any custom statuses you add. This is how a step like “Pickup” can be marked as a custom Picked Up status while still tracking as Done underneath.
- Field Mapping per step — controls the field values used when the step’s task is created. For step 1, set manual default values. For step 2 onwards, you can also map a field from any earlier step so that its captured value is copied into the matching field of the new step’s task.
- Custom Statuses — opens the Manage Status modal where you can add extra status labels used in Status Mapping. Each Workflow starts with three default statuses (Unassigned, Ongoing, Done) that cannot be removed, and you can add your own on top. A custom status name only has to be at least 1 character — keep it short and descriptive so it stays readable in the Status Mapping dropdown.
Accessing the Workflow Page
Open the Flow section from the main sidebar, then pick the Workflow tab at the top of the page. The Workflow page lists every Workflow in your organization and is the entry point for creating, editing, and deleting Workflows.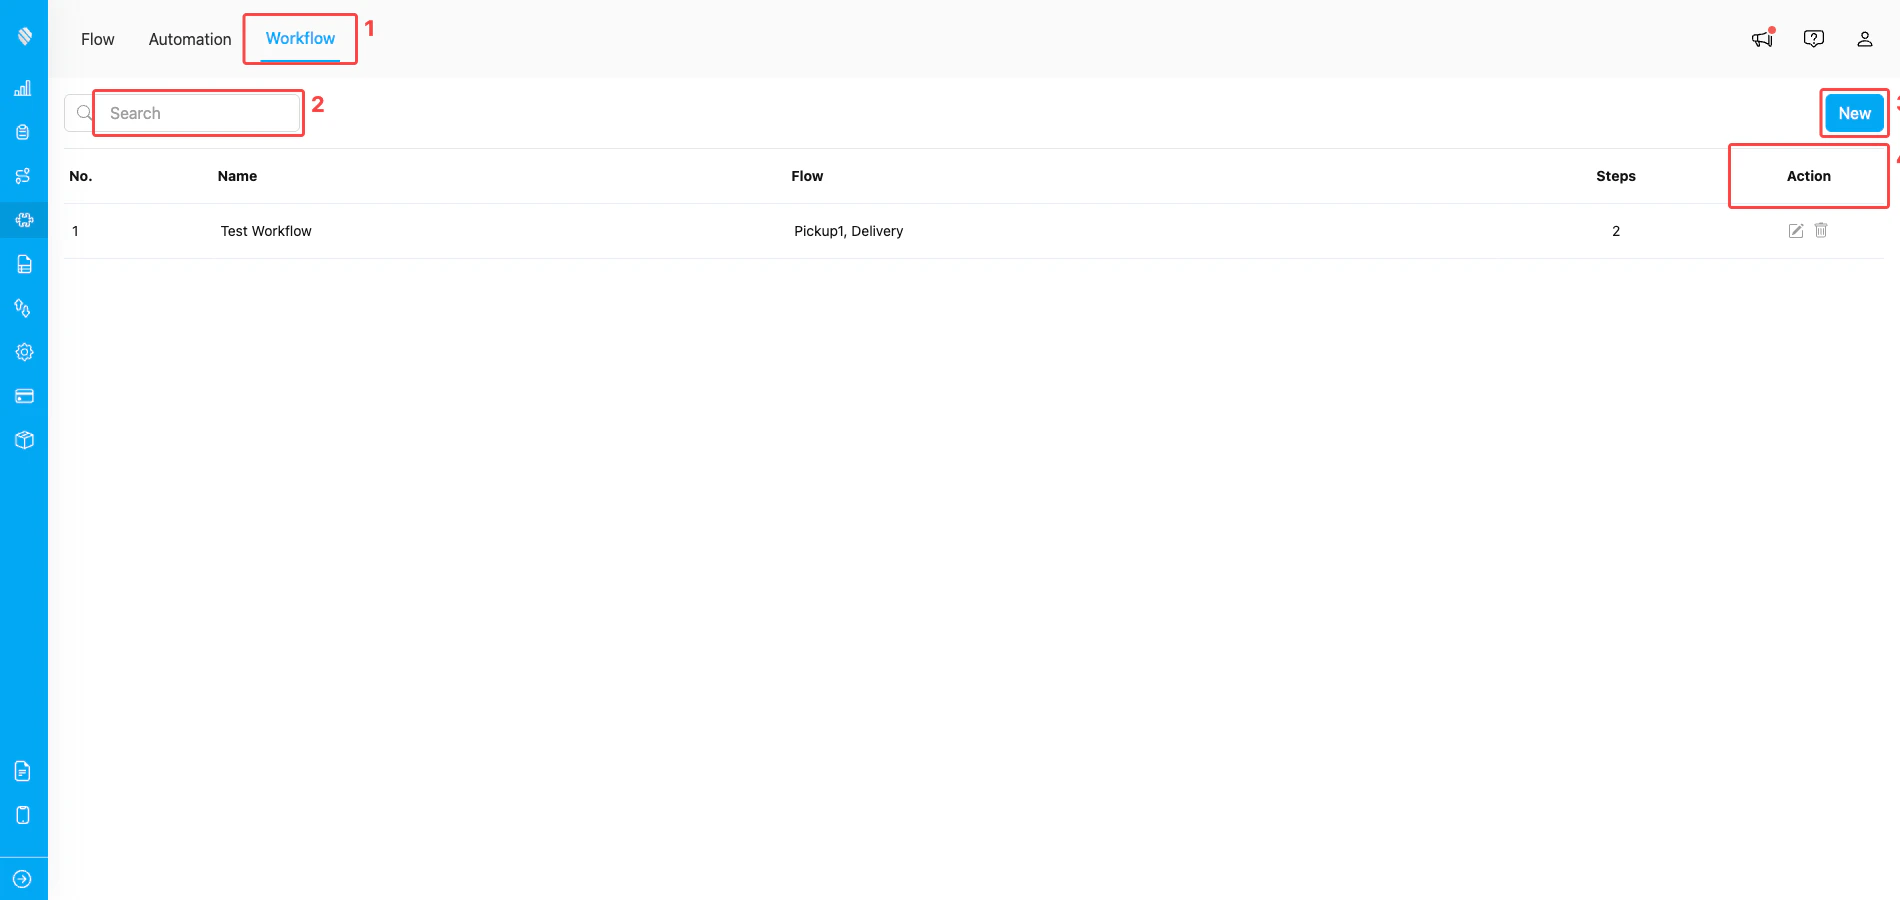
The Workflow page — open it via the Workflow tab (1), filter by name with the search bar (2), create a new Workflow with the New button (3), and edit or delete an existing one from the Action column (4)
What’s Next
- How to Use Workflow — Run a saved Workflow by creating an Activity from it.
- Building Workflow — Step-by-step guide to creating a Workflow.
- Managing Workflow — Editing, deleting, and managing custom statuses.
- Activity in Task — How a Workflow runs once it is used to create an Activity.