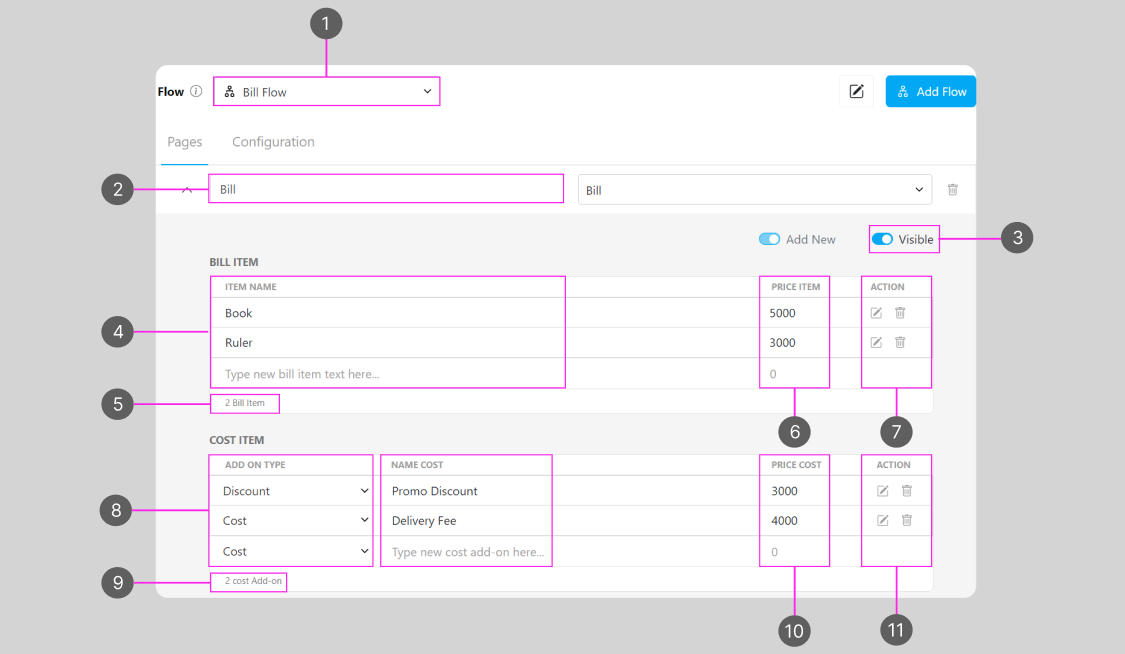
- Flow name that you would use to create a Task
- Bill component name on the Initial page, you should use this name to refer to the list component from the mobile app page
- Visibility of this component will affect: Create Task on the Web and Mobile; and View Task on the mobile app, if the component is not visible, it won’t be shown on the UI. Visible & Hidden component data will be exported, regardless of their visibility.
- You can enter the name of the item that will be used in the billing process, such as item names such as book, ruler, and others related to the billing process.
- Total bill item that you have created
- After enter item name, now enter the price of the item.
- You can add other data by pressing the enter button, data that was previously stored temporarily and can add additional data. Previously created data can also be edited or deleted.
- Add-on types can be selected according to needs. If you have a promo, you can choose a discount option for a price reduction. You can select a cost option if there are extra costs, such as shipping costs.
- Total cost item that you have created
- Name of the cost item that will be used, such as discounts, shipping costs and others.
- Price cost value given to the cost item used will affect the total price on the billing
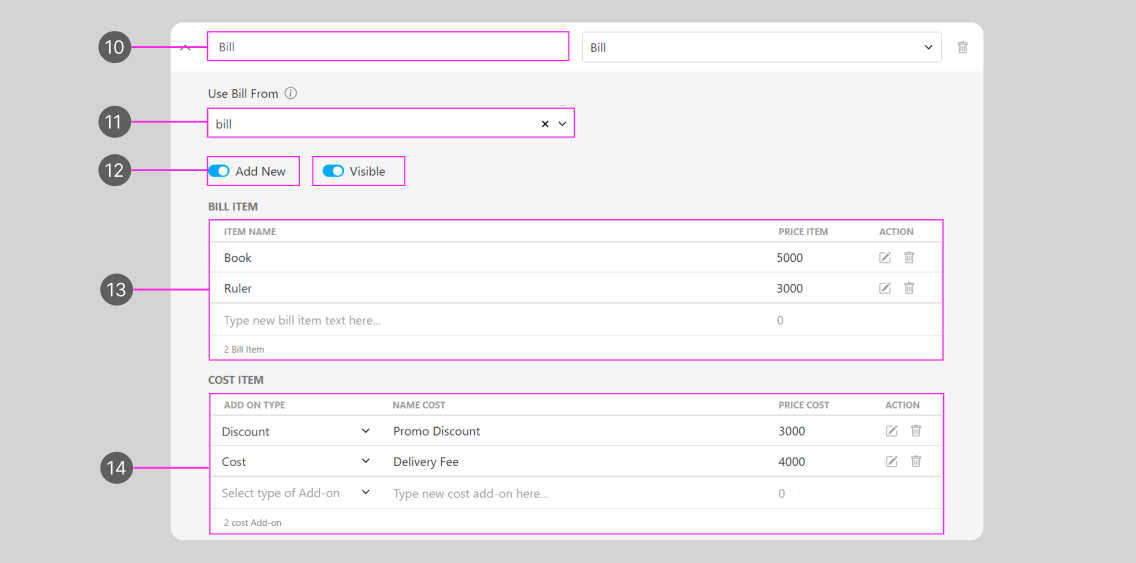
- Bill component name in the Initial page, you should use this name to refer to the mobile app page
- The value that will be referred to by this Bill component, in this example we refer to the Bill component in the Initial page
- This toggle will affect the ability to Add New bill items on the mobile app, if you turn it off the field user can’t add more bill items, if you turn it on they could add more.
- Bill item section displays data referred to from the initial page or another page according to what we choose on the Use Bill Form. This data can also be added in the same way as points 2 - 4. This data will be used to make transactions on the bill component.
- The cost item section displays data that is referred from the initial page or another page according to what we choose on the Use Bill Form. This data is optional and may be filled in when there is a discount or extra cost. Cost item data can be added similarly to points 5 - 7. This data will be used to make transactions in the billing process.
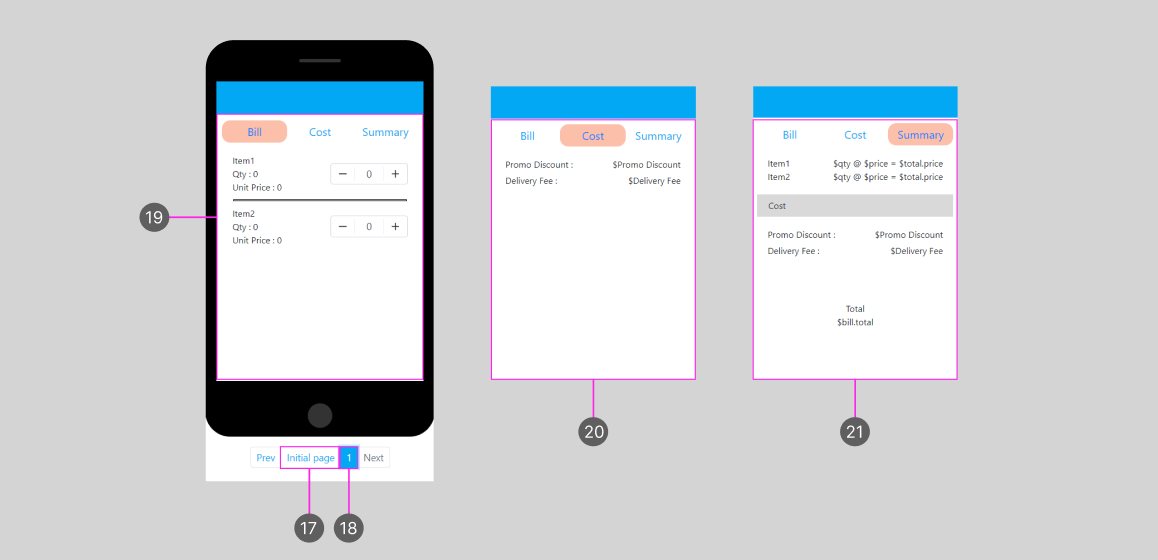
- Navigate to the Initial page
- Navigate to the Mobile app page, you could add more pages as you need
- Detail of bill view in the mobile app, bill view contains item detail information, price and quantity
- Detail of cost view in the mobile app, cost view will show extra cost in the Bill
- The summary view in the mobile app, will show the total Bill + extra Cost
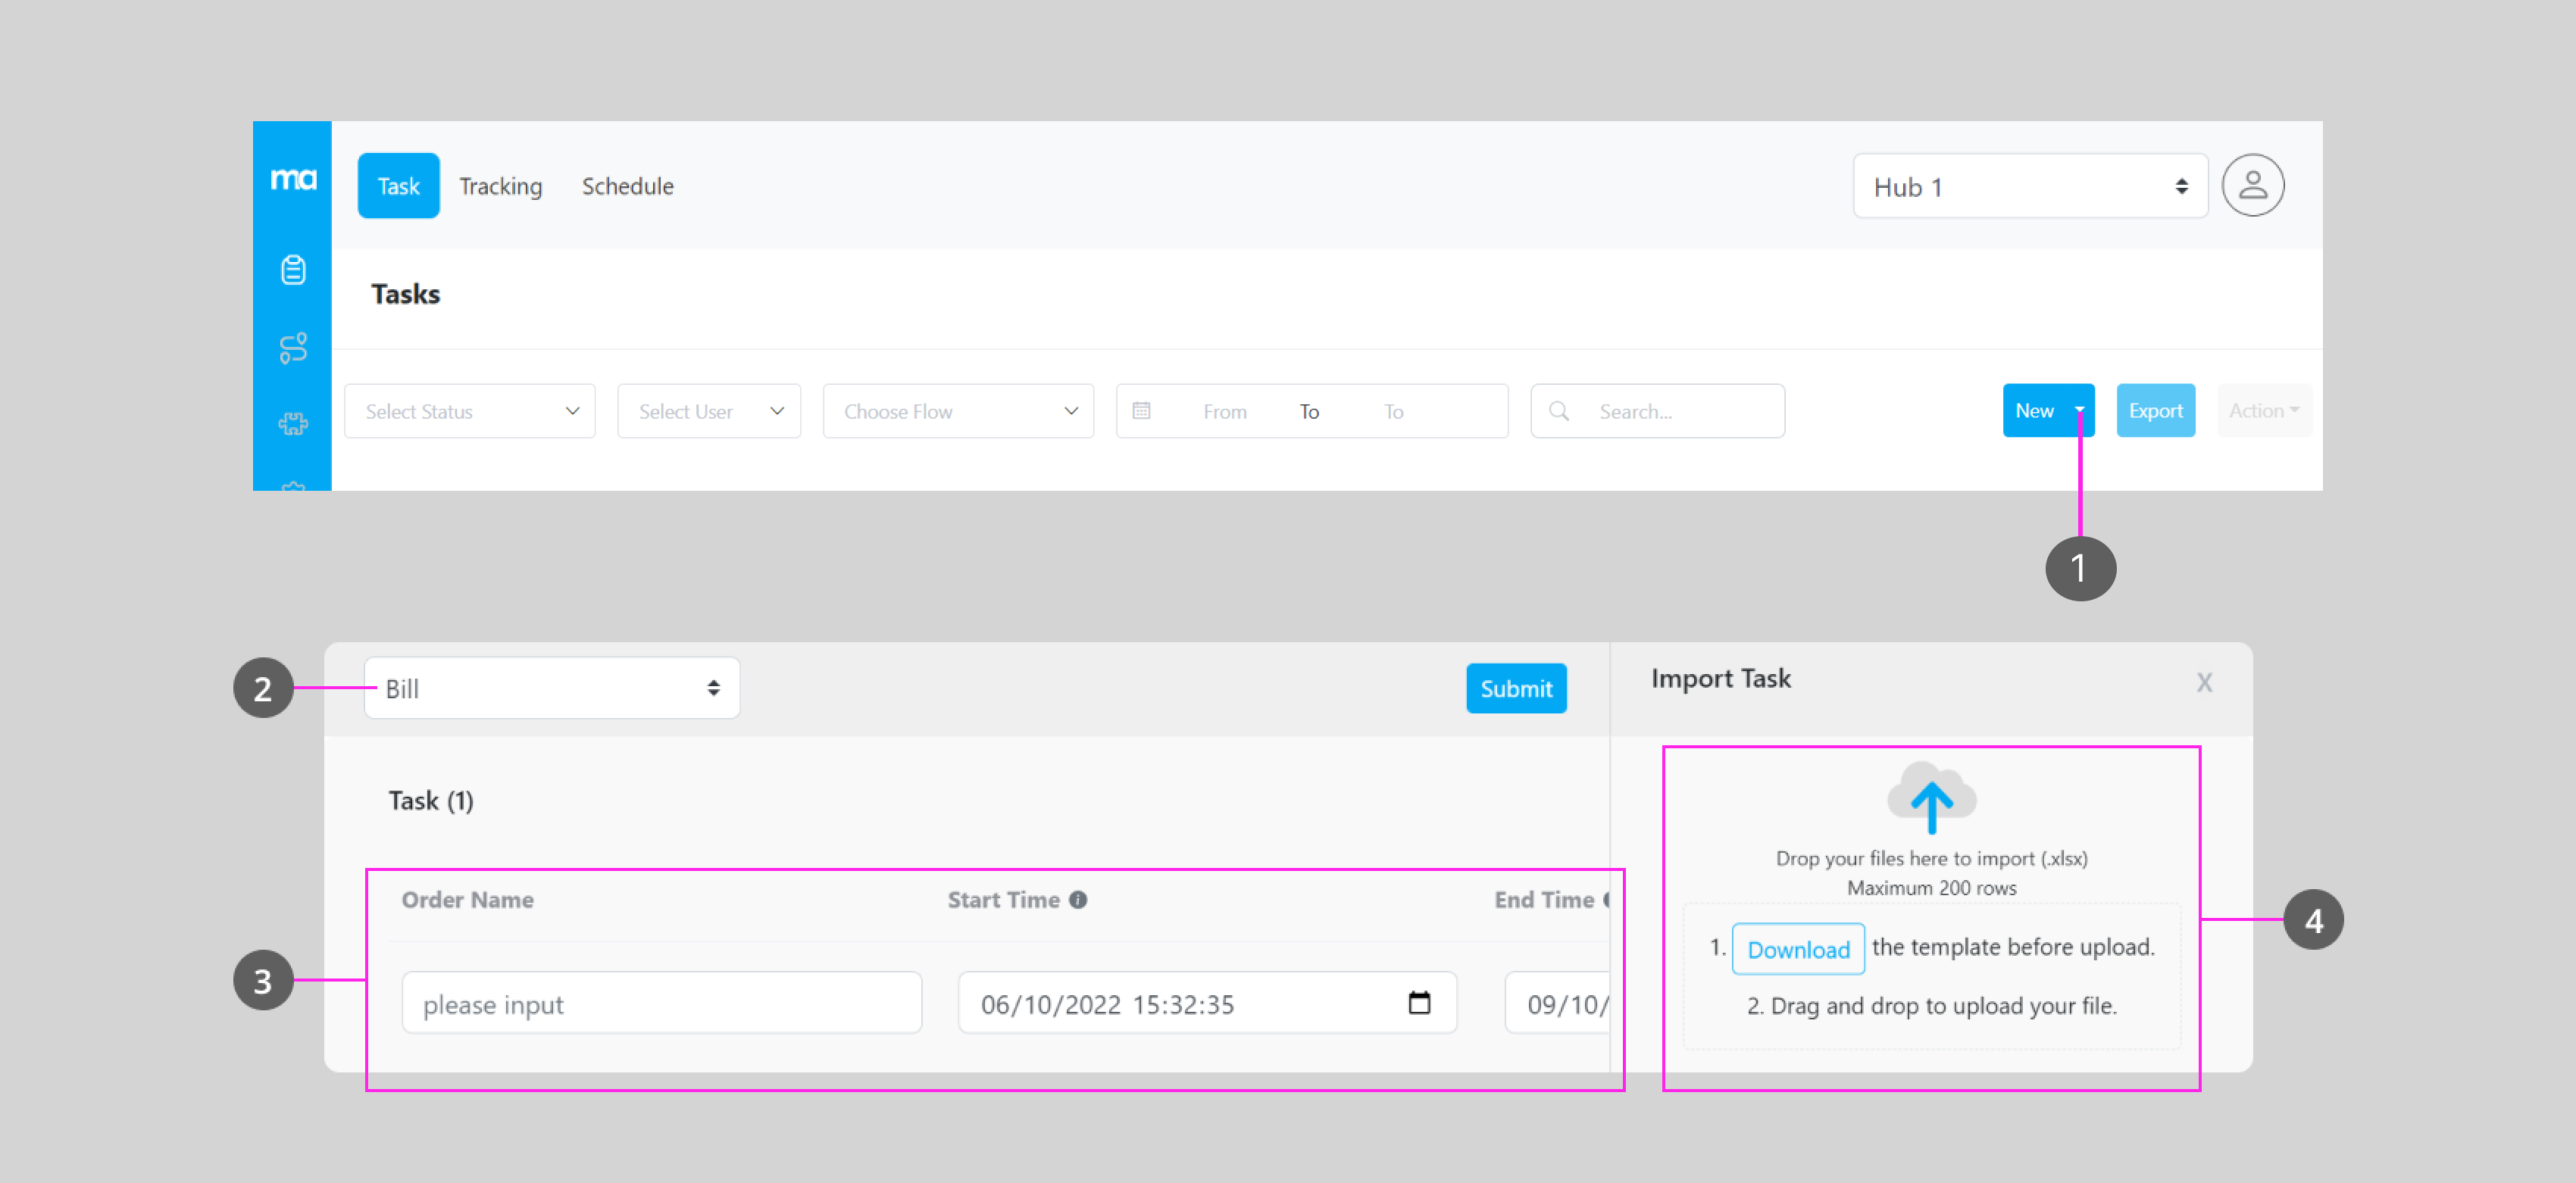
- Click this button to add a new task in bulk
- Choose the Flow with a Bill component that you have created
- This field will be filled with information that you’ve put in the .xlsx file after you import the Task, you could view and edit the information here
- The bulk import Task field
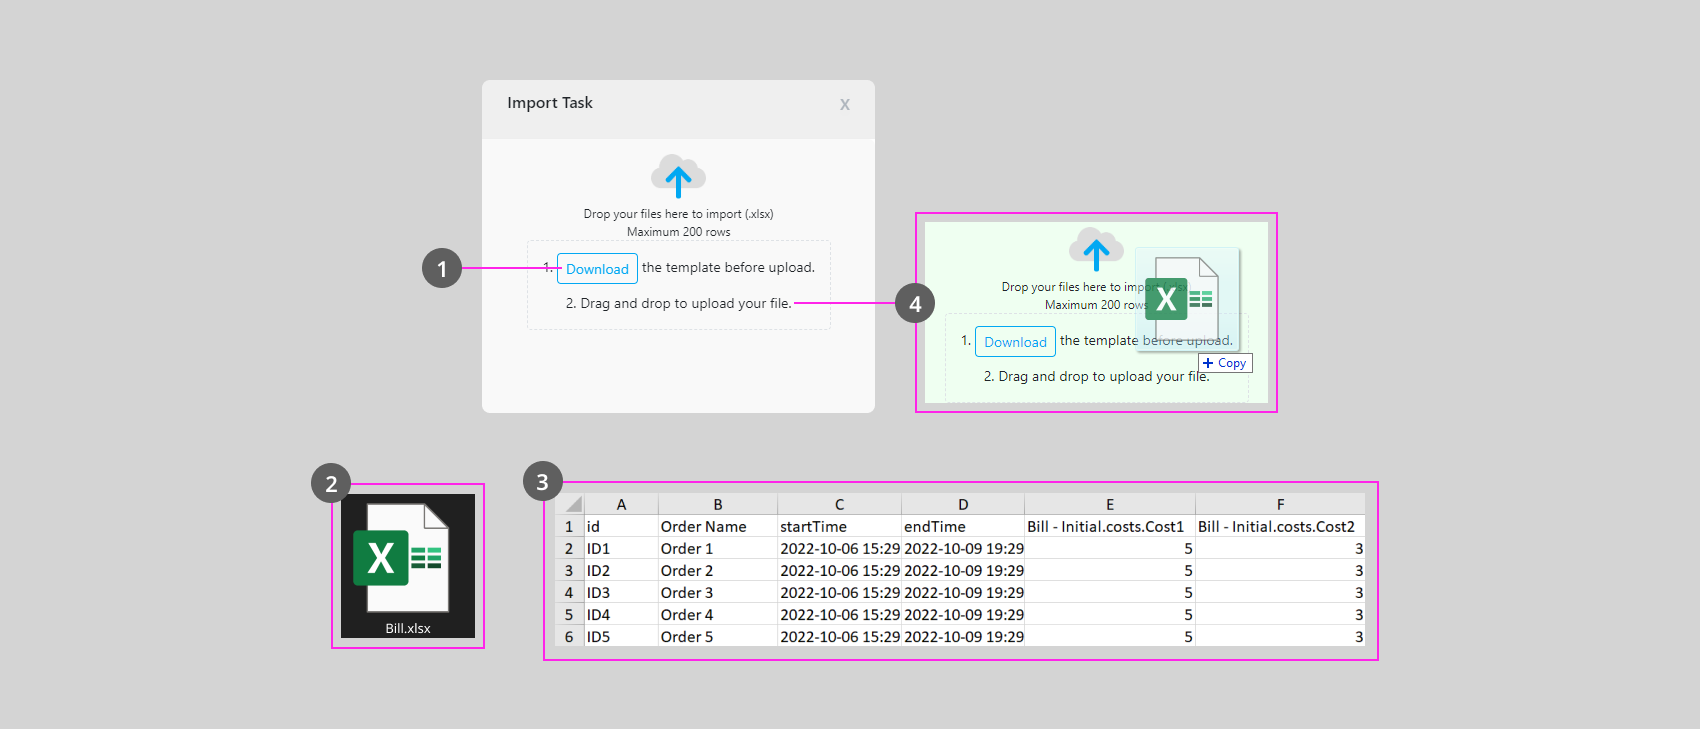
- After you choose a Bill’s Flow that you want to import, Download the templates for import.
- You should automatically download the .xlsx file after clicking the Download button, and open the file once it’s downloaded.
- Fill in the information in the file
- Drag and drop the file to this field to import the task from the file that you have edited
- Information for the Task and Cost setting from the Flow
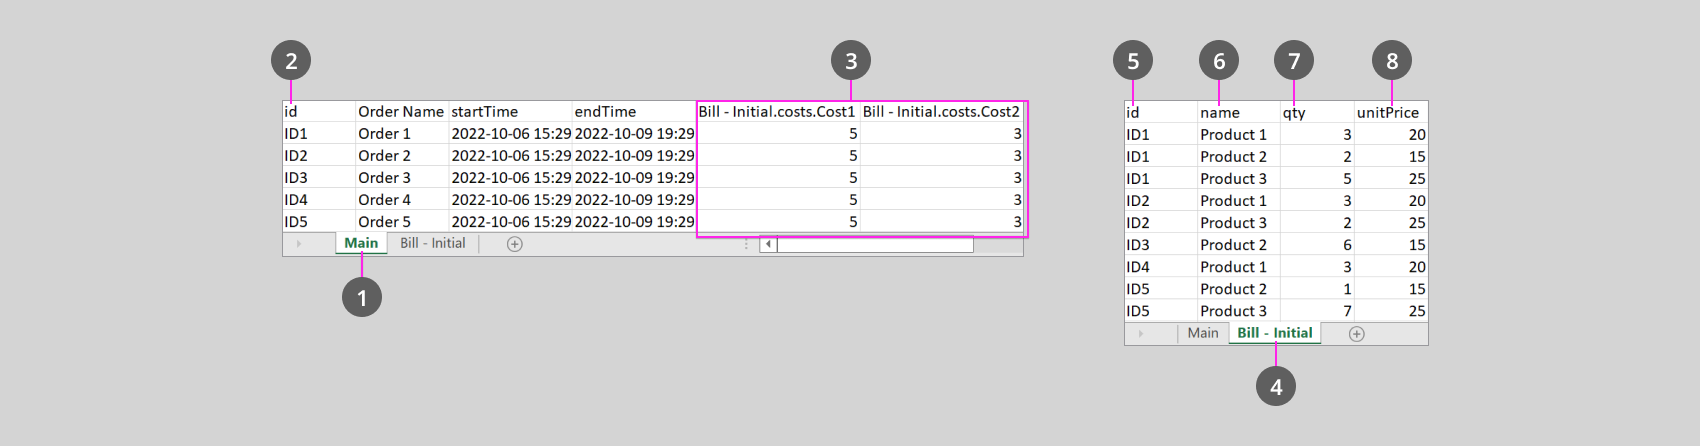
- ID number of the order in the Bill, please note that these ids are linked to the second page (5).
- Costs detail from the Flow’s setting, this is optional, this field won’t be created if you didn’t set it up from the Flow builder.
- Information of the Bill, this is where you put the individual order of this bill
- ID number of the order, you could use an ID multiple time if there are multiple order for that ID, for example, if a user order 3 different product, this ID should have 3 different product linked to it. This ID is linked to the (2) Main page.
- Name of the product, you could put multiple products for an ID
- Quantity of the order
- Price of a single product