

Required permission:
- View Data Source
- Create Data Source
- Edit Data Source
- View Task
- Create Task
- View Team
- View User
The Order Table
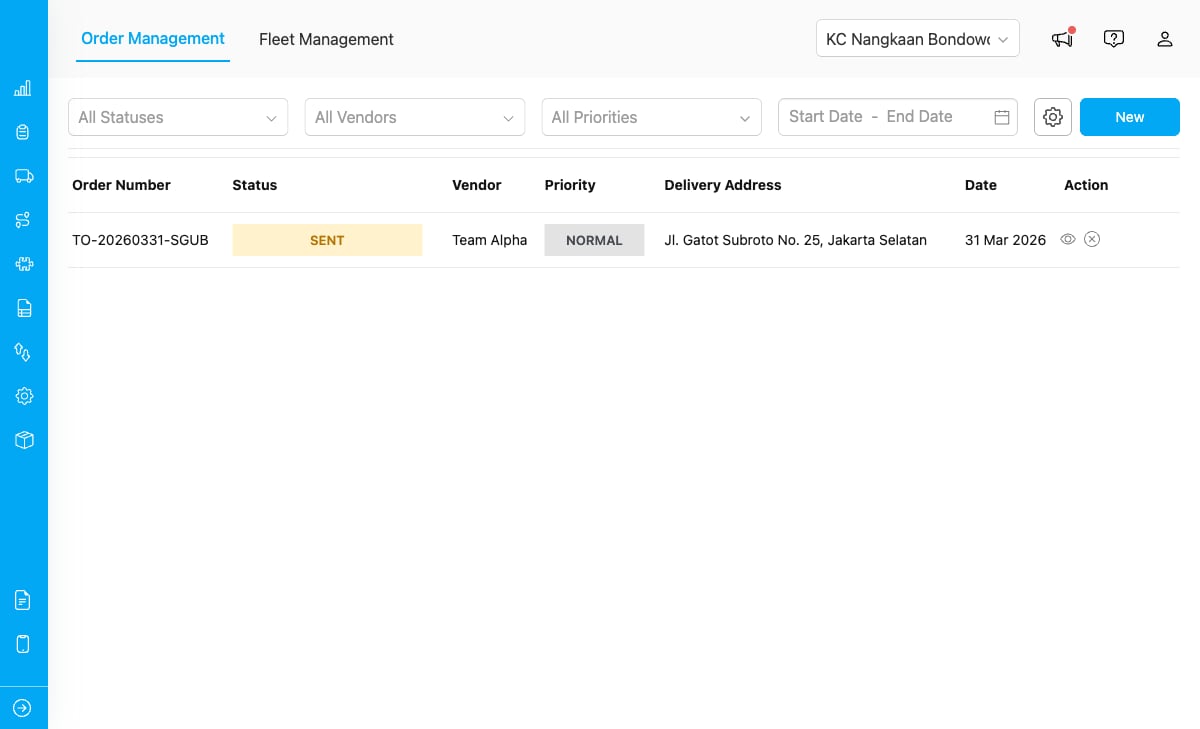
The Order Management page showing a filterable list of delivery orders with status, vendor, and priority columns.
Each row displays:Searching and Filtering
Use the filter bar at the top of the page to narrow down orders.
Filters combine. For example, selecting Status “Sent” and Vendor “PT Logistics” shows only sent orders for that vendor.
Creating an Order
Required permission:
- Create Data Source
- Click the + New button on the Order Management page.
- Fill in the order details in the form.
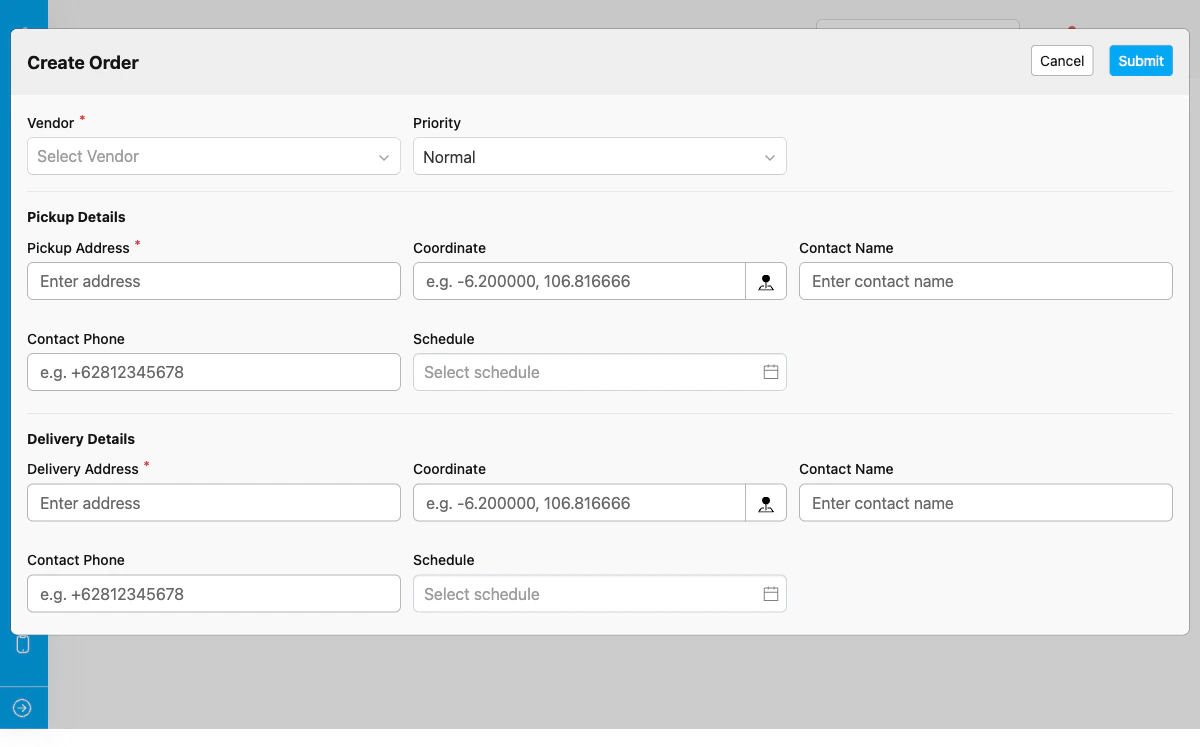
The order form with sections for general information, pickup details, delivery details, and items.
The form is divided into four sections:General Information
Pickup Details
Delivery Details
Items
Click Add Item to add items to the order. Each item has:- Click Save to save the order as a draft.
Sending an Order
- Find the order with Draft or Rejected status in the table.
- Click the Send icon in the Actions column.
- Confirm the action in the popup dialog.
Accepting an Order
When a vendor receives a sent order, they can accept it by assigning a driver and vehicle.- Find the order with Sent status.
- Click the Accept button.
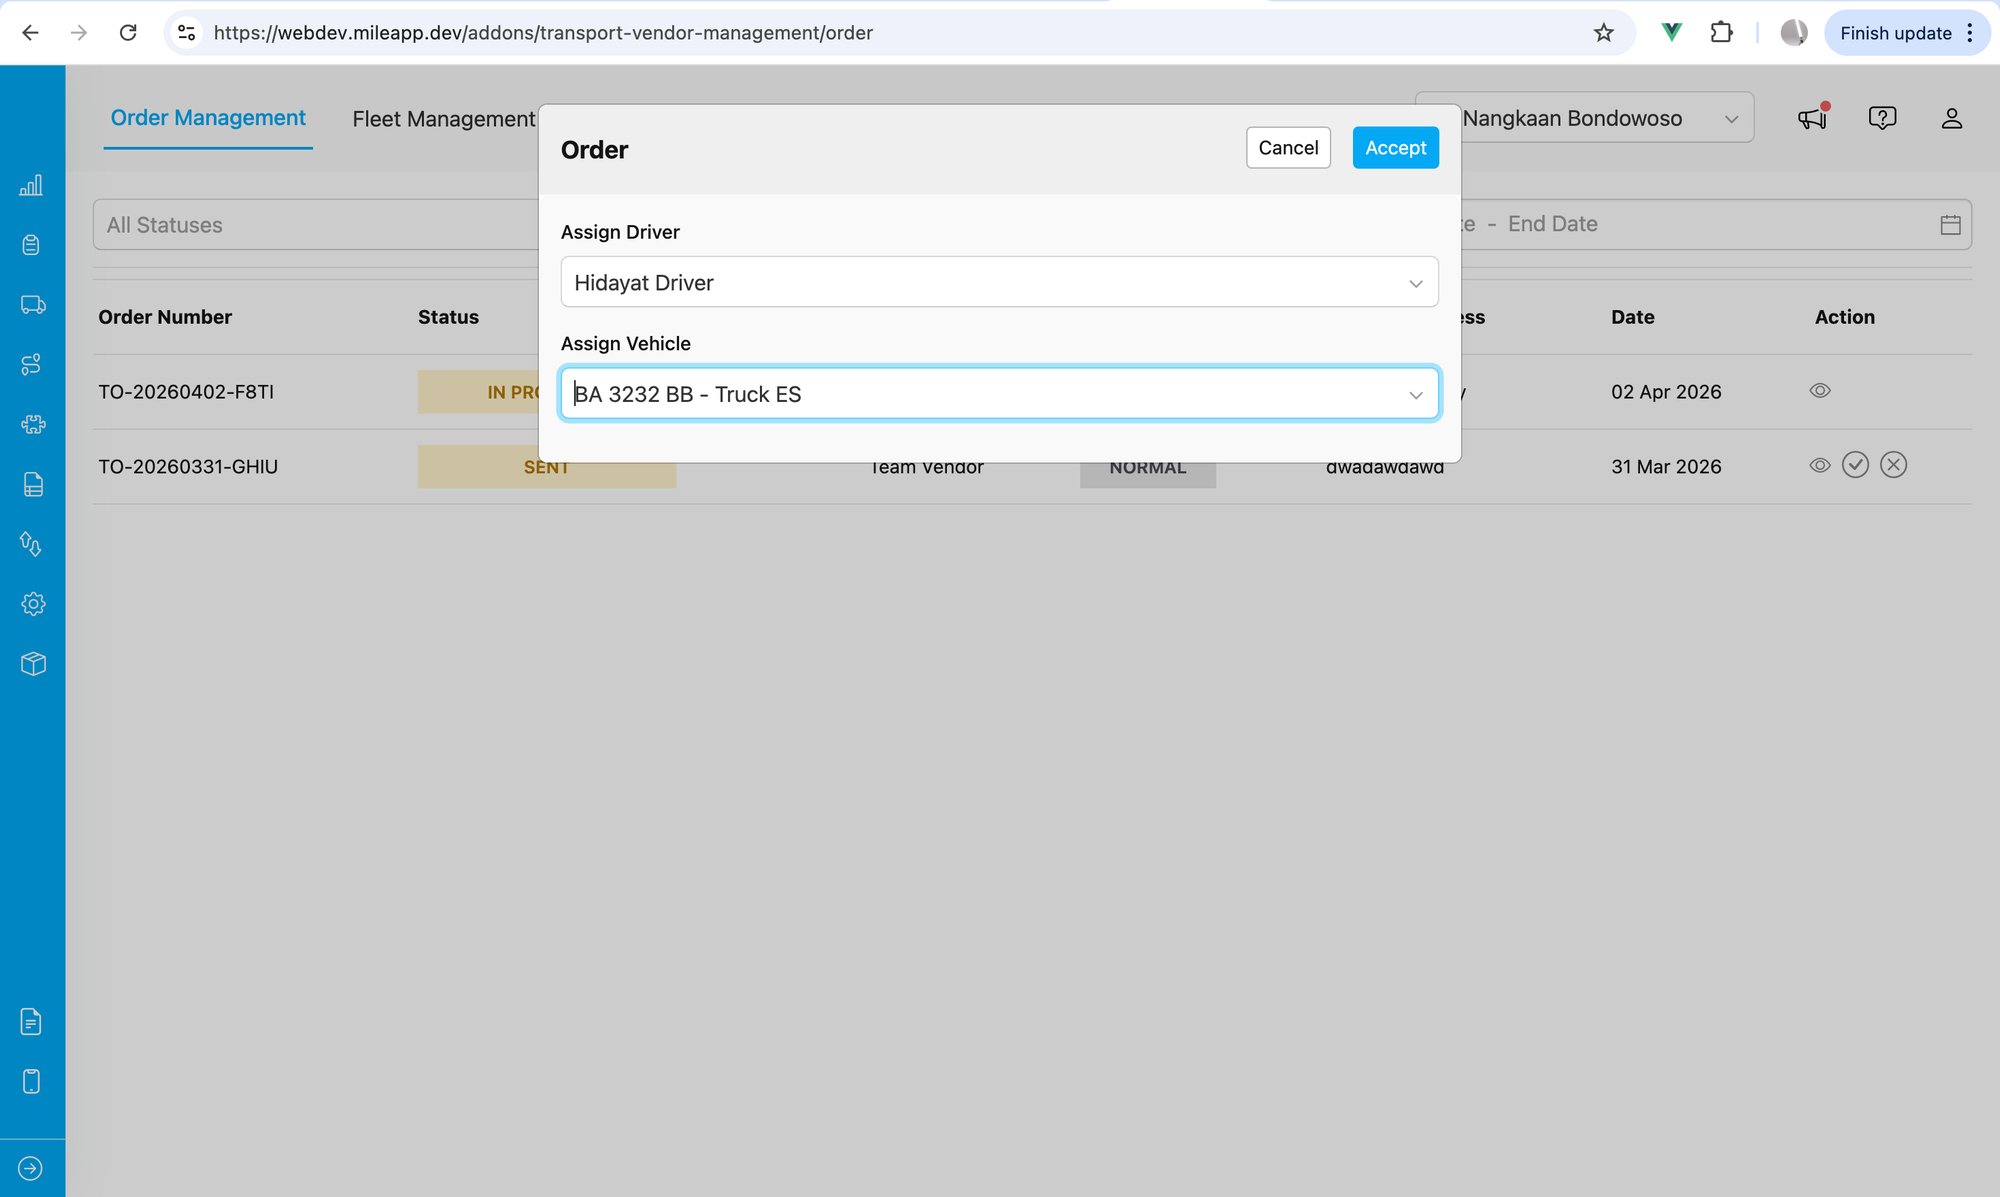
The Accept Order modal where vendors select a driver from their team and a vehicle from their fleet.
- Select a driver from your team members.
- Select a vehicle from your fleet (only active vehicles are shown).
- Click Confirm to accept the order.
- The order status changes to Accepted
- A pickup task is automatically created and assigned to the selected driver
- The driver receives the pickup task in the MileApp mobile app
Rejecting an Order
- Find the order with Sent status.
- Click the Reject button.
- Enter a rejection reason in the dialog.
- Click Confirm to reject.
Viewing Order Details
Click on any order row to open the detail view.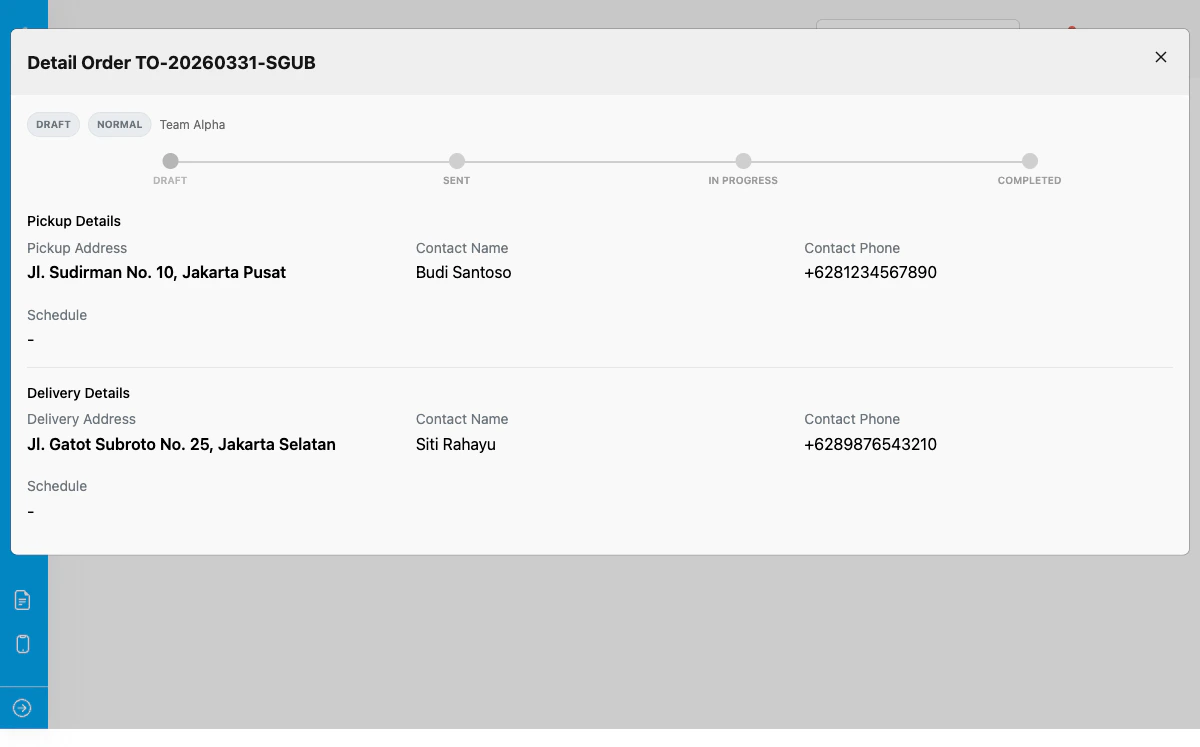
The order detail view showing the timeline stepper, pickup and delivery details, assignment info, and task tracking.
The detail view shows:Cancelling an Order
- Find the order in the table (status must be Sent, Accepted, or In Progress).
- Click the Cancel icon in the Actions column.
- Confirm the cancellation in the popup dialog.
Cancelling an in-progress order does not automatically cancel the associated pickup or delivery tasks. You may need to manage those tasks separately.