Setting Up and Configuring Routing Webhooks in Automation
1. Introduction
The Automation feature of our product has been enhanced to include webhooks, allowing you to receive the routing result data directly to your specified URL. This user manual will guide you through the process of setting up and configuring webhooks in the Automation settings.2. Prerequisites
Before proceeding, ensure that you have the following:- Access to your user account on MileApp.
- A valid URL where you want to receive the webhook payload.
3. Setting Up a Webhook
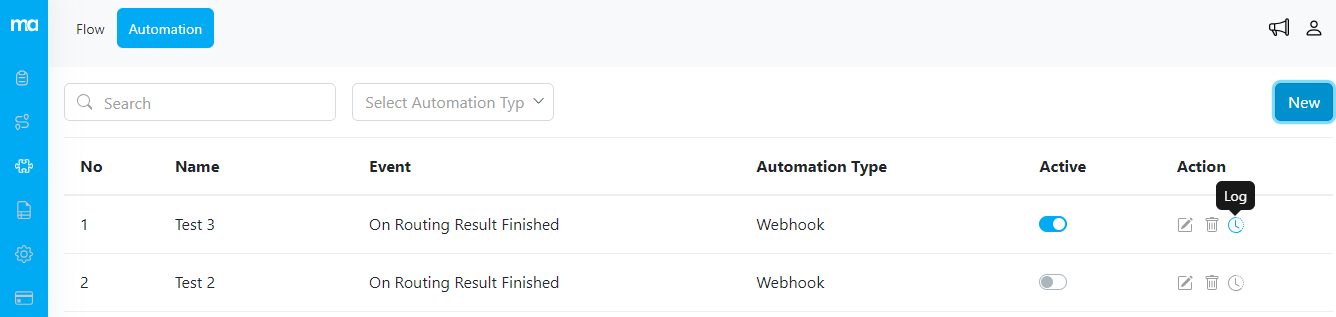
3.2 Creating a New Automation
- In the Automation settings, locate the “New” button and click on it.
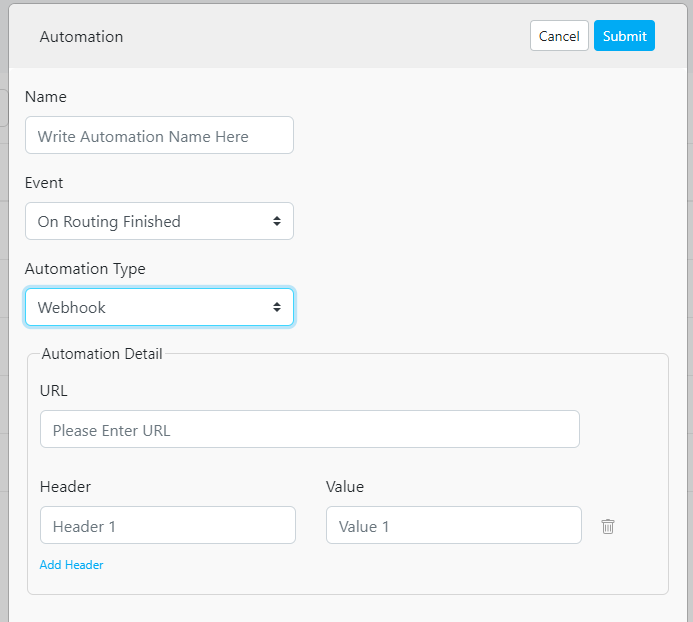
- This will open a new automation configuration page. Fill in the following details:
- Automation Name: Provide a descriptive name for your automation to easily identify it later.
- Event: Select the “On Routing Finished” event to trigger the automation when the routing process is completed.
- Automation Type: Choose “Webhook” as the automation type to enable webhook integration.
- URL: Enter the URL where you want to receive the webhook payload.
- Header (Optional): If required, specify any additional headers to be included in the webhook request.
- Value (Optional): Provide corresponding values for the headers if applicable.
- Once you have completed the automation configuration, save or apply the changes to create the new automation. Once active, the automation will send the payload to the specified URL every time the route optimization process is completed.