Activating Cross Docking
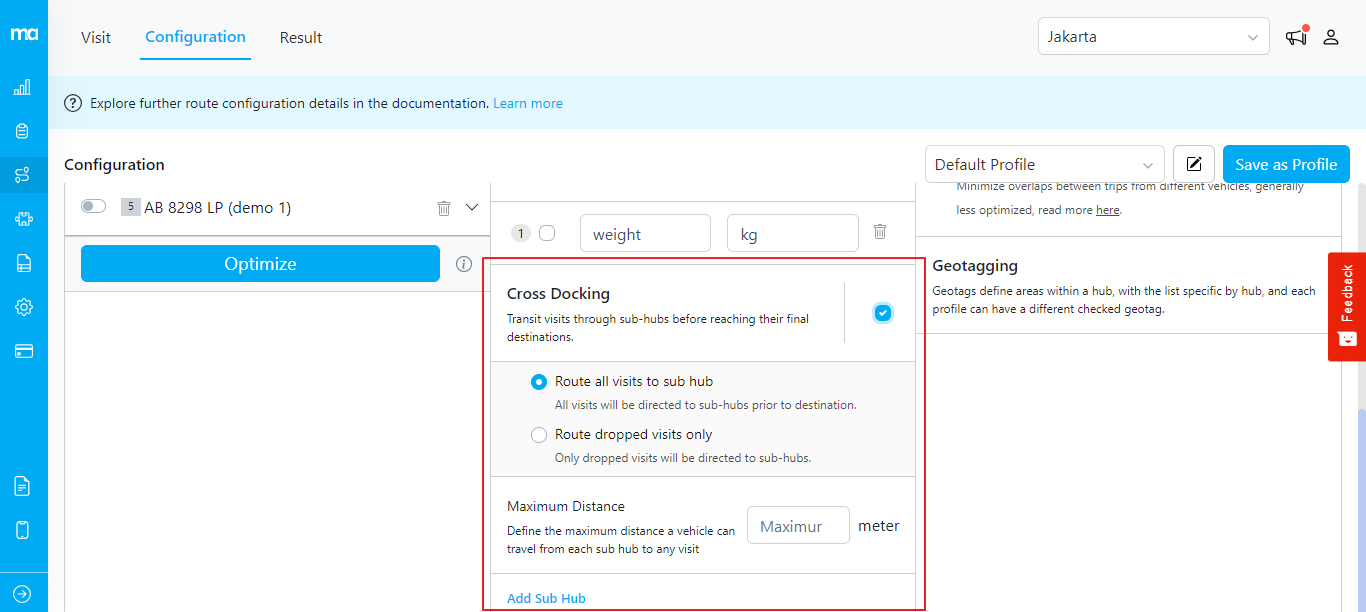
To activate Cross Docking, follow these steps:- Go to the Routing/Configuration menu.
- Check the “Cross Docking” checkbox.
- Two Cross Docking types will be available:
- Route all visits to sub hub: Routes all visits through Sub Hubs before reaching the destination.
- Route dropped visits only: Routes unrouted visits to Sub Hubs, while direct delivery from the Main Hub is still possible.
- The “Maximum Distance” option for vehicle sub hubs allows you to specify the maximum distance, in meters, that a vehicle can travel. If you don’t want to set a maximum distance, leave this field empty.
- Rules and Validation:
- Rule: It’s important to note that the maximum distance setting only affects vehicles stationed at sub-hubs. Vehicles originating from the main hub remain unaffected by this parameter.
- Validation:
- Upon initially checking the Maximum Distance checkbox, the input field defaults to an empty state, prompting you to enter a value.
- The minimum allowable value for Maximum Distance is set at 1000 meters.
- Rules and Validation:
Sub Hub Management
After activating the Cross Docking option, a feature to manage the Sub Hub will be available below. On this page, you can create, edit, and delete the Sub Hub, but you need to map the vehicles on the Routing/Vehicle page. Follow these steps:Creating Sub Hubs
- Click the “Add sub hub” button to choose a hub.
- Choose and configure up to 10 Sub Hubs.
Mapping Vehicles to Sub Hubs
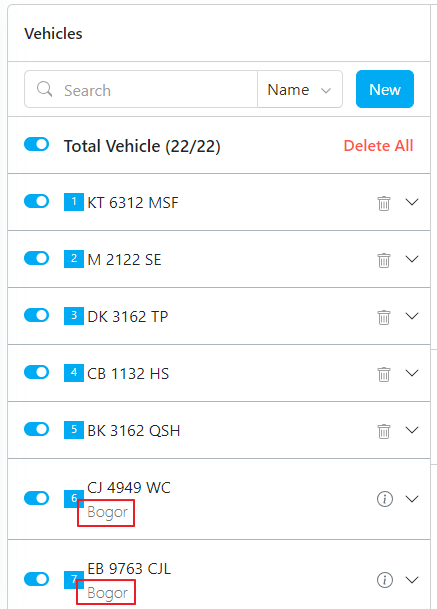
- In the Routing/Vehicle menu, create or edit vehicle data.
- In the top corner, you can choose to manage vehicle for main hub or sub hubs.
- You can specify whether a vehicle is allowed to be routed to sub-hubs by selecting the option “Allow this vehicle to be routed to a sub-hub”. Note that this option only applies when choosing the “Route dropped visits only” type of Cross Docking.

Route Optimization
Running Optimization
- With the Configuration and Vehicle settings in place, click the “Optimize” button.
- The system will run in the background.
Viewing Optimization Results
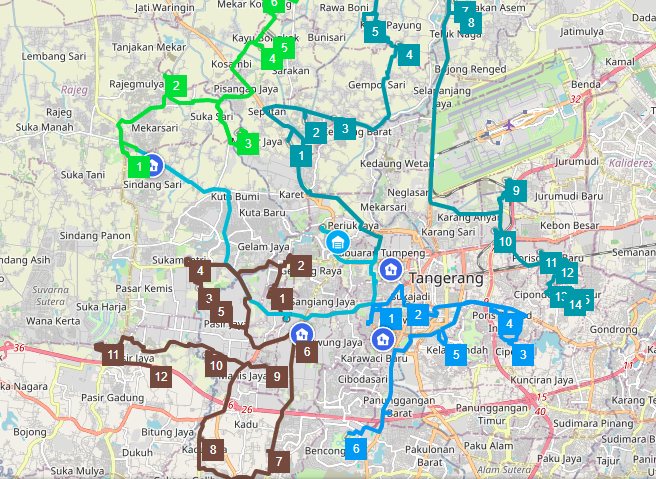
- The Routing/Result menu will display all selected vehicles along with the Sub Hub names on the left panel.
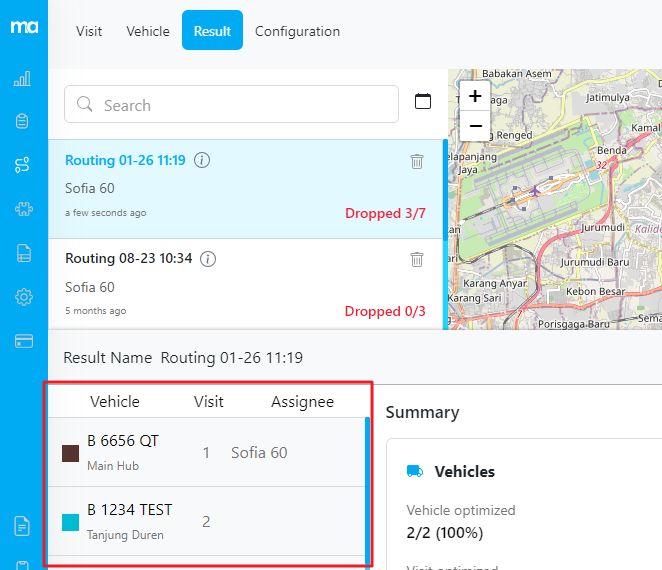
- Mapped routes from the Main Hub to Sub Hubs and from Sub Hubs to destination will be shown.
- Distinct icons for Main Hub and Sub Hubs will be included.
- A summary section will indicate the chosen Cross Dock type.
Exporting Data
When exporting data, the “Other” sheet will include information about the Cross Dock type.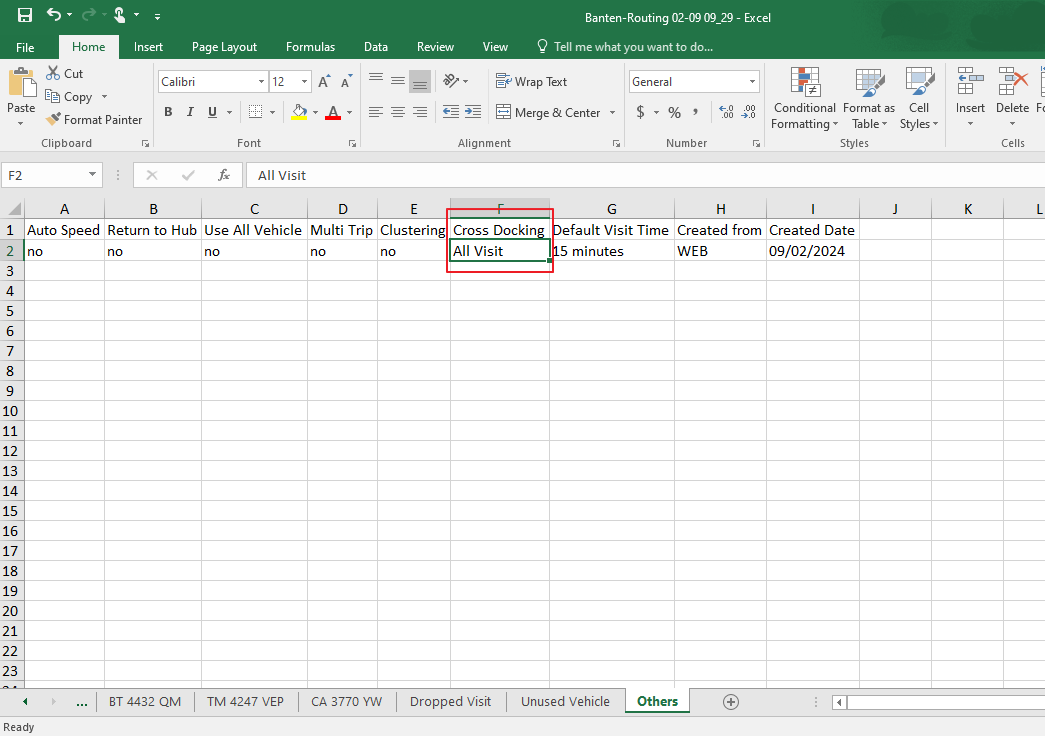
Dispatching Visits
When clicking “Dispatch,” the process of assignment will run in the background as we generate additional tasks from the Main Hub to Sub Hubs to facilitate order handovers. The number of tasks generated will depend on the count of routed visits to Sub Hubs. The additional tasks will include some relevant information such as “Handover From” (taken from the assignee vehicle), “Handover To” (user input), and “List Order” (task title). When dispatching routing results with Cross Docking, remember:- Tasks routed to Sub Hubs will be moved accordingly.
- In the Task menu, select the corresponding sub-hub in the right corner to view assignments.