> ## Documentation Index
> Fetch the complete documentation index at: https://docs.mile.app/llms.txt
> Use this file to discover all available pages before exploring further.
# How to Manage Custom Module
## Introduction
Custom modules are a feature that allows you to integrate additional modules into MileApp. These modules will be displayed as additional menu items in the sidebar, and when you click on them, they will open a new tab in the browser with the specified URL. You only need to provide a module name and URL to create a custom module. The custom modules also work on the mobile app, providing you with the flexibility to access these modules on the go.
## Add Custom Module
To add a custom module, follow these steps:
1. Log in to your MileApp account.
2. Select the "Settings" menu.
3. In the settings menu, type the URL [https://web.mile.app/setting/custom-module](https://web.mile.app/setting/custom-module)
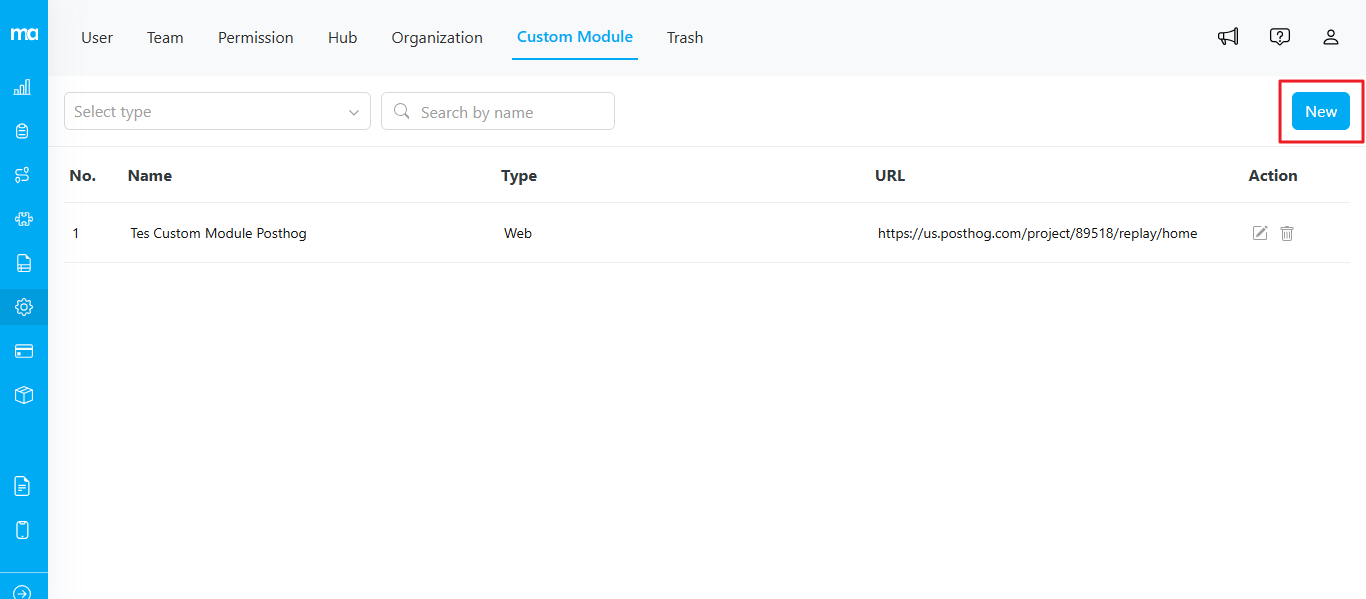
4. On the "Custom Modules" page, you will see a list of existing custom modules (if any). To add a new custom module, click the "New" button.
Fill in the following information:
1. **Name**: Enter the name that will be displayed in the sidebar as the module's title. **Note**: Ensure you are not using a module name that already exists in MileApp.
2. **Type**: You can choose if this menu option should open in a new web tab or show up as new menu in mobile app.
3. **URL**: Enter the URL of the additional module that will be accessed when this module is clicked.
4. After filling in the information, click the "Submit" button to save the custom module.
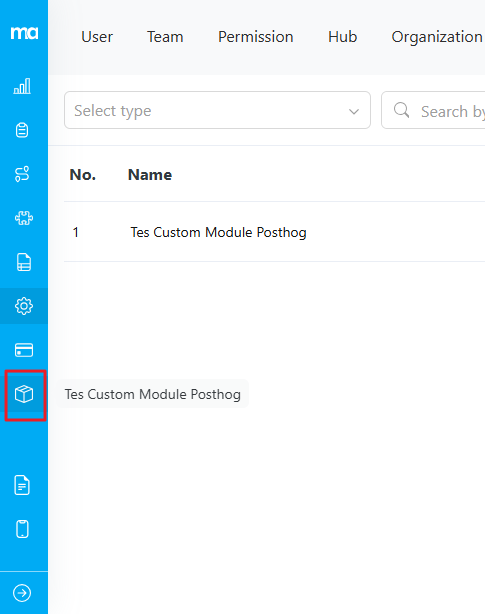
After adding a custom module, you will see it displayed in your sidebar or navigation menu.
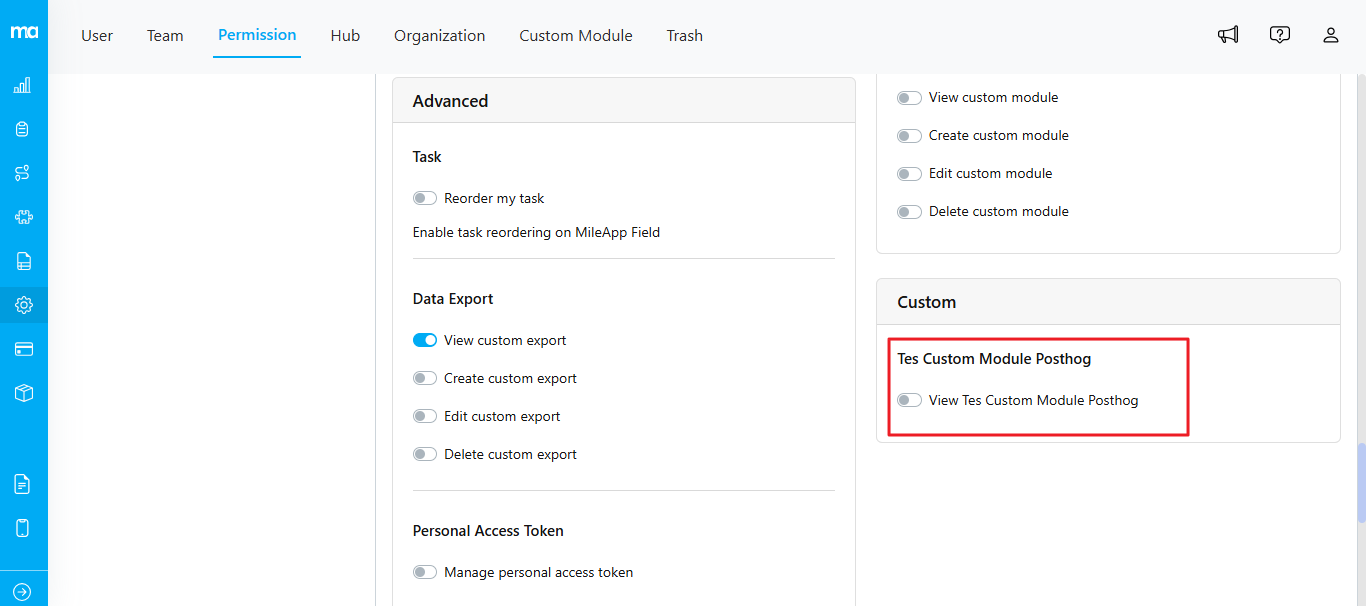
**Please be aware that when you successfully create a custom module, the system will automatically generate custom permissions associated with the module. For instance, if you named your custom module as "Tes Custom Module Posthog" the system will generate a corresponding permission called "View Tes Custom Module Posthog."**
## Edit Custom Module
You can edit all fields except the name. If you wish to edit the name, you can consider deleting the existing one and creating a new custom module.
## Using the `{SHORT_TOKEN}` Placeholder in the URL
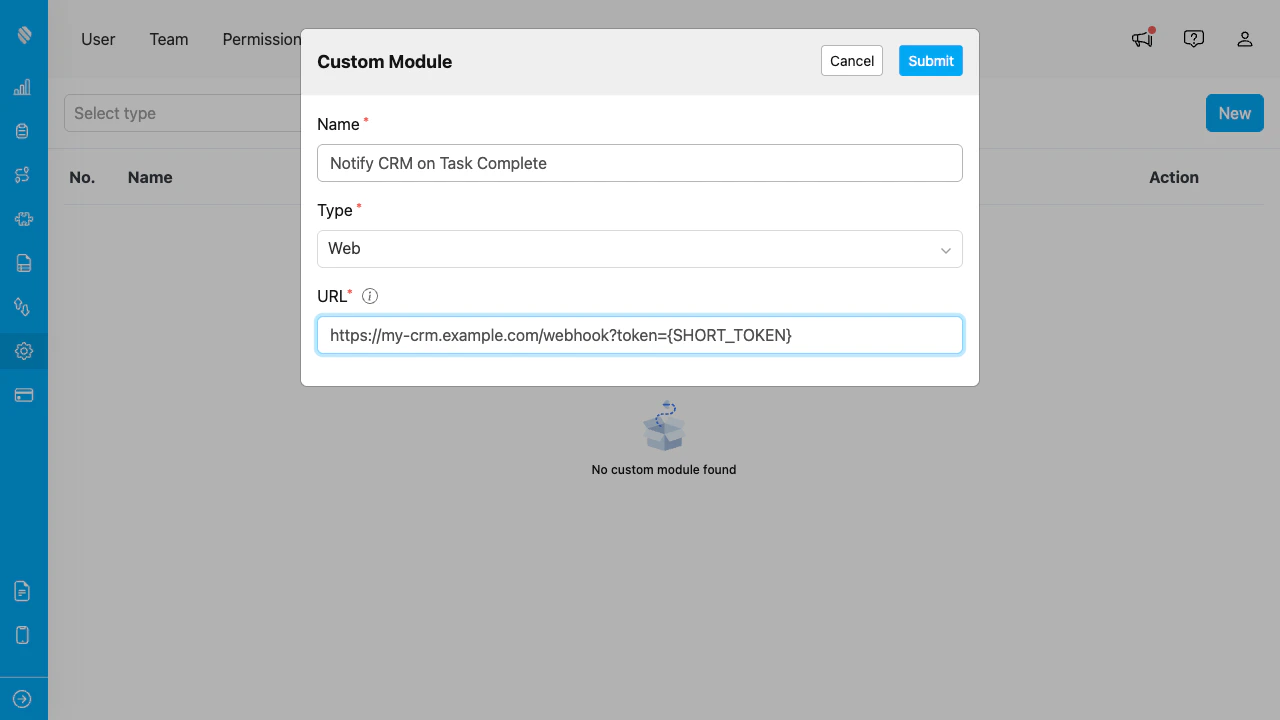
The URL field accepts a special placeholder, `{SHORT_TOKEN}`, that lets your external service authenticate the user **without ever seeing the user's bearer token**. This is the recommended pattern when your Custom Module URL points to a third-party endpoint that needs to know who the user is.
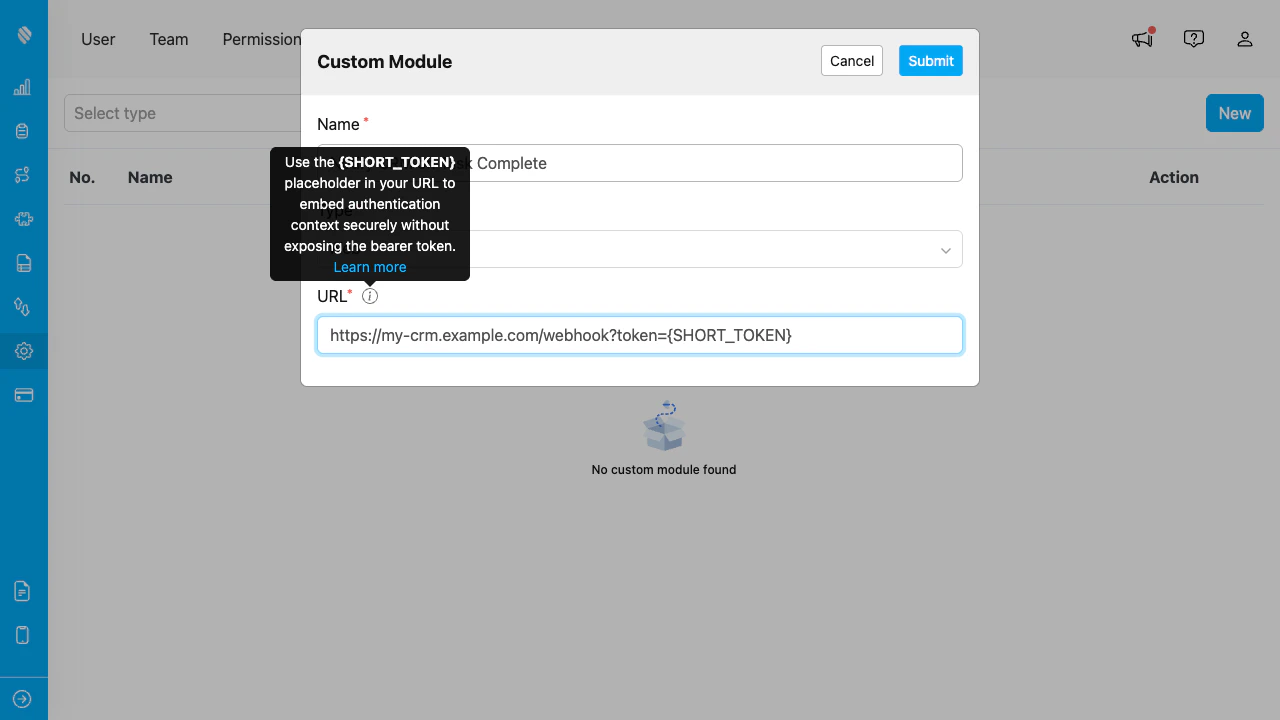
The Add/Edit Custom Module dialog showing the URL field with `{SHORT_TOKEN}` and the tooltip describing the placeholder.
### Why use it
Embedding a bearer token directly in a URL (e.g., `?token=eyJhbGc...`) leaks the credential to external service logs, browser history, and any intermediary that observes the request. The bearer is then valid for the rest of its lifetime — typically hours. `{SHORT_TOKEN}` swaps that long-lived credential for a one-time, 5-minute placeholder that your external service exchanges for the bearer behind the scenes.
### How to use it
**Step 1 — Embed `{SHORT_TOKEN}` in the URL** anywhere your external service expects the credential:
```
https://my-service.example/webhook?token={SHORT_TOKEN}
```
Place `{SHORT_TOKEN}` wherever your external service expects the credential.
When MileApp invokes this URL, it auto-generates a fresh short token (5-minute TTL) and substitutes the placeholder before sending. You do **not** need to call the Generate API yourself for this case.
**Step 2 — Receive and resolve on the external side.** Your service receives a URL with a real short token in place of the placeholder, e.g. `?token=abc123def456ghi789`. Immediately POST it back to MileApp to exchange for the bearer:
You can **skip this step** if your external service does not need to call MileApp APIs on the user's behalf — for example, if your service only consumes the data passed in the request, runs its own logic, and responds (without writing anything back to MileApp). Resolving the short token is only required when you need a `bearerToken` to make authenticated requests to MileApp on behalf of the user.
```bash theme={null}
curl -X POST "https://apiweb.mile.app/api/v3/short-token/resolve" \
-H "Content-Type: application/json" \
-d '{"shortToken": "abc123def456ghi789"}'
```
Response:
```json theme={null}
{
"status": true,
"message": "Success.",
"data": {
"bearerToken": "eyJ0eXAiOiJKV1QiLCJhbGciOiJSUzI1NiJ9...",
"userId": "6804ef87fff429d06900a937",
"organizationId": "6804ef87fff429d06900a932"
}
}
```
Use the returned `bearerToken` for subsequent calls back to MileApp APIs (e.g., to update a task on behalf of the user) and use `userId` / `organizationId` for your own authorization checks.
**Step 3 — Handle failures.** The resolve endpoint returns **400 Bad Request** when the short token has expired (>5 minutes), never existed, or is malformed. Treat any 400 as an unauthenticated request and reject the operation — do not retry, the token is gone.
```json theme={null}
{
"status": false,
"message": "Short token is invalid or expired"
}
```
### Constraints
* **TTL: 5 minutes.** Resolve promptly on receipt — do not queue or process asynchronously.
* **Treat the short token as you would a password** — do not log it, do not store it, do not include it in error reports.
* **TLS only.** All calls to `apiweb.mile.app` are HTTPS.
### Generating a short token outside the Custom Module flow (advanced)
If you need to mint a short token in your own integration code (i.e., outside the Custom Module invocation), call the Generate endpoint with the current bearer token:
```bash theme={null}
curl -X POST "https://apiweb.mile.app/api/v3/short-token/generate" \
-H "Authorization: Bearer eyJ0eXAiOiJKV1QiLCJhbGciOiJSUzI1NiJ9..."
```
The response carries the same `shortToken` + `expiresAt` shape.